You can make a difference in the Apple Support Community!

When you sign up with your Apple Account, you can provide valuable feedback to other community members by upvoting helpful replies and User Tips.

📰 Apple Fitness+ unveils an exciting lineup of new ways to stay active and mindful in 2025

Offerings include new programs for strength, pickleball, yoga, and breath meditation, and a new collaboration with Strava. Learn more >

Looks like no one’s replied in a while. To start the conversation again, simply ask a new question.

Zoom in on Still Image with a mask

I have still image that I have trimmed and moved. I have established keyframes to zoom in on the image. I now need to mask the image such that visible area stays the same as I zoom in. A previous answer (which I lost and cannot find) suggested adding a V2 Layer with a White background trimmed to the size of the image I am zooming in on. No joy, the mask only appears once and then disappears as the image in zoomed in on.


MacBook Pro 16″, macOS 10.15

Posted on Jul 16, 2020 11:50 AM

Reply
Question marked as Top-ranking reply

Posted on Jul 17, 2020 3:00 AM

It is not totally clear if you mean the same region of the original image, or the same area of the frame.

In any case, it is not at all difficult to achieve. Suppose you have an image like this and want the mask to correspond to the marked rectangle:


Situation A: when you zoom in, you want the rectangle to grow too; so you mask the same area of the image all the time.


Solution: just add the mask to the clip


Situation B: when you zoom in, the size of the mask remains the same, and any part of the image outside the fixed size rectangle is masked out.


Solution. Turn the image into a compound clip. Add the mask to the compound, but zoom the image.


5 replies
Question marked as Top-ranking reply

Jul 17, 2020 3:00 AM in response to GeraldLH51

It is not totally clear if you mean the same region of the original image, or the same area of the frame.

In any case, it is not at all difficult to achieve. Suppose you have an image like this and want the mask to correspond to the marked rectangle:


Situation A: when you zoom in, you want the rectangle to grow too; so you mask the same area of the image all the time.


Solution: just add the mask to the clip


Situation B: when you zoom in, the size of the mask remains the same, and any part of the image outside the fixed size rectangle is masked out.


Solution. Turn the image into a compound clip. Add the mask to the compound, but zoom the image.


Jul 17, 2020 8:19 AM in response to GeraldLH51

I can tell you in more detail how I did the example shown in the GIF file in my previous post.


At the bottom is the image of Babar, king of the elephants - call it clip B (for background)

The image with names of characters of the series is above it - call it clip F (for foreground)


It may look like this:


Now I want that only a rectangular area around the first three names is shown and Rataxes is masked out.


I could apply a shape mask to F and it will look fine:


Now if I scale F (e.g. to see the text more clearly), then I get this:


The whole rectangle grows and partially covers Babar.


That is "Situation A" on my previous post.


Hang on for "Situation B"...

Jul 17, 2020 8:57 AM in response to Luis Sequeira1

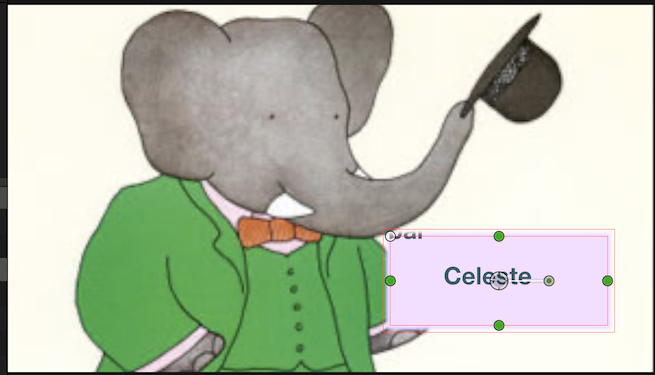
Alternatively, we may still want to zoom in the text, but keep the size of the rectangle the same - for example, to emphasize the word "Celeste".


So we now we go back to the step before adding the mask:
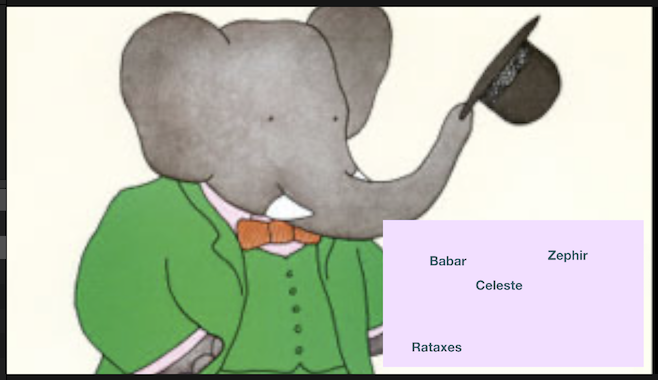


We select the F clip in the timeline:
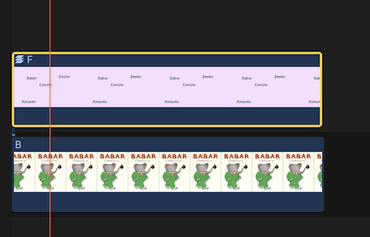

and press Option-G to create a compound clip. We may rename it "F Compound" for clarity:
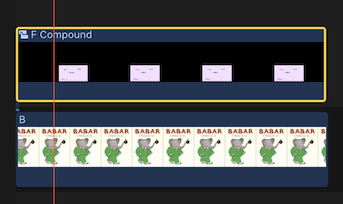

We now add the mask to "F Compound":
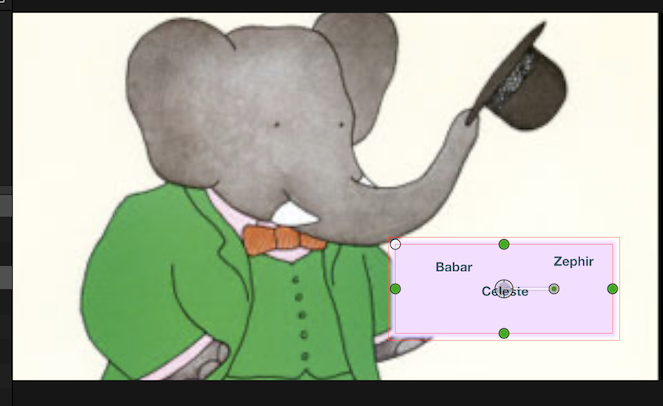


It looks just like the previous version, but now we scale the original F clip.

To do this we need to double-click F-Compound.

A slight inconvenient of doing this is that when we drill into the compound we will not be able to see the clip B.


In the compound clip timeline:


we select the F clip and scale it up, in the Inspector or the Viewer.

Then click the < button above the timeline to go back to the project.


Notice how the contents of the rectangle were scaled up, but the rectangle is still the same size - now showing the word Celeste in a larger size. Go back and adjust if necessary (for instance, here we can still see the edge of the word "Babar" in the corner):


Zoom in on Still Image with a mask

Welcome to Apple Support Community
A forum where Apple customers help each other with their products. Get started with your Apple Account.