- Launch Shortcuts
- File menu : New Shortcut (this will be the highest numbered New Shortcut n.)
- Right-click and choose Edit
- In the search field, enter select in the Documents section double-click Select File action, and then double-click that action to add it to the workflow window.
- In the search field, enter set, and then double-click the Set Variable action to add it below the previous action.
- In the search field, enter combine and double-click Combine Images
- Finally, in the search field, enter save and double-click Save File.
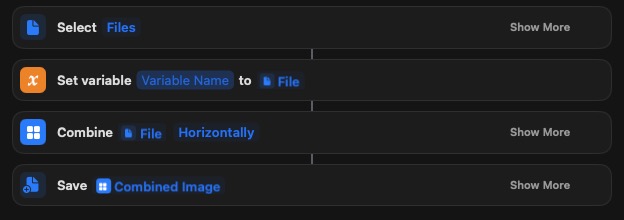
At this point you will see the stack of actions:
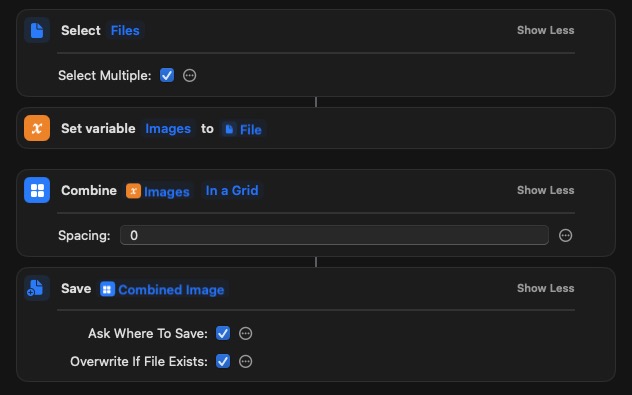
In Select files, click Show More, and choose Select Multiple. Click Show less to close than panel.
In Set variable, single click on Variable Name, press backspace to remove that string, and enter Images.
In the Combine panel, change File to Images by right-clicking on the word File and select the Images variable from the bottom of that menu. Change Horizontally to Grid by clicking on it. If you want image separation (e.g. spacing), then click on Show More and enter the integer spacing amount.
For Save, it should show Combined Image, so don't change that, and click Show More to choose Ask Where to Save and whether you want to overwrite if a file exists.
Shortcuts autosaves your changes, and you can practice running this by just clicking the ▶︎ run button, choosing your image files, and the last file chooser is the prompt to choose the destination folder to right the combined image too.
It will look like this when you are done.
Click on the main Shortcuts window, locate your last New Shortcut n icon, right-click on it and choose Rename and give it a meaningful name. In the left panel of the main Shortcuts window, you will see places where you can drag and drop the Shortcut. You can even drag and drop it onto your Dock for single-click access.