Hi Ian,
Thank you for that!
I redesigned the title — it now supports ovals and rotation.
I got rid of the OnScreen Control - just click and drag the text where you want it.
The original OSC was off-center, but I've provided center guides (Show Center) so that you can align other graphics to it. (It seems to be accurate — considering what I had to go through to get it!!)
I added a Circle Text - Badge *effect* that can be added (multiple times) to the title — with it, you can create easy to fit shapes (circles/ovals) to the text.
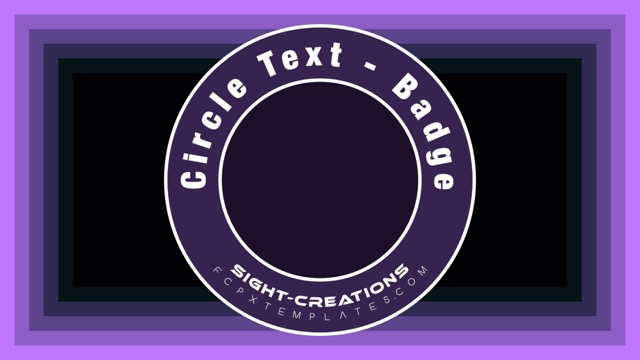
Circle Text - Badge has an OSC ("Poke") which will help you align the shape to the center of the text (using the Center guides).
The blend mode defaults to Behind, but you can "Bring to Front" to fill inside circles. It also has the Radius and Rotation controls that can be used to match the text. Fill and Outline options included.
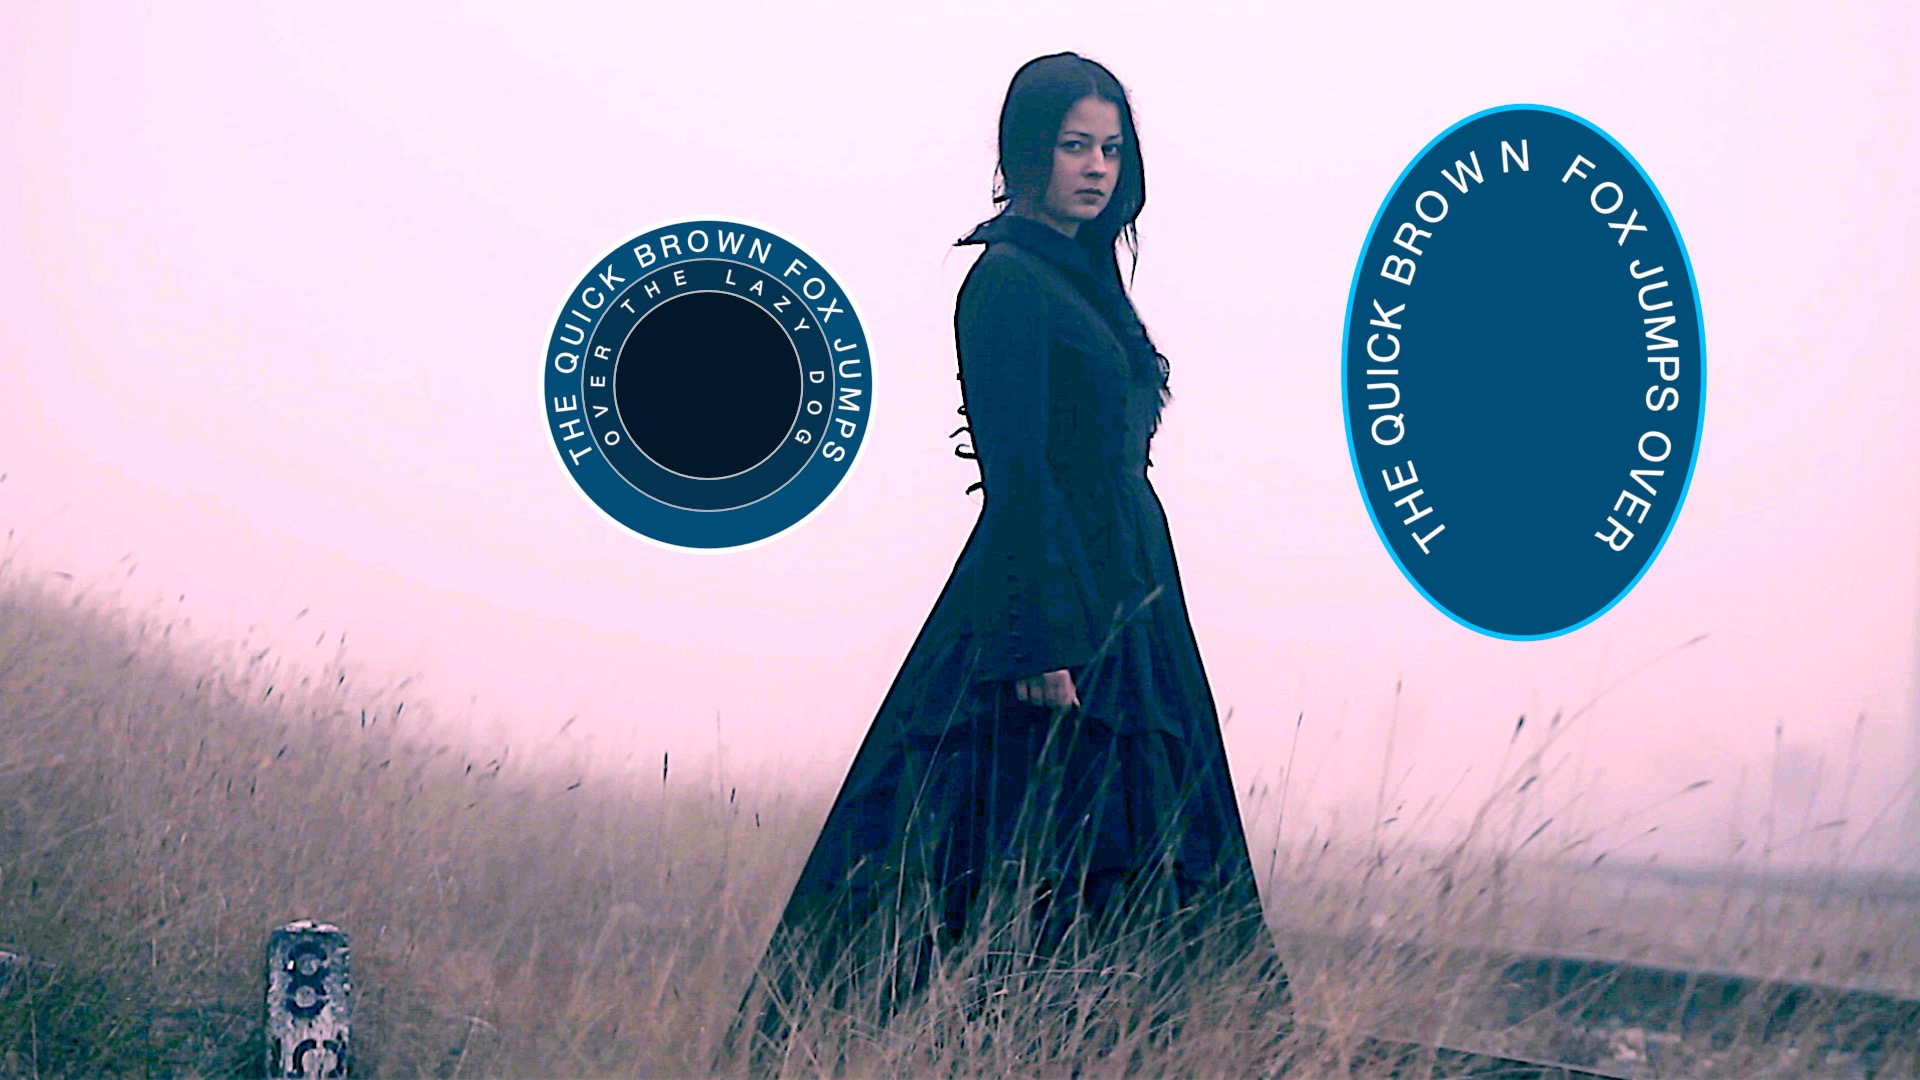
As shown, Circle Text supports "multi-line" entries (the lower text above is one Circle Text object - centered, sized, with different fonts in the Text Inspector.)
The following shows 1 Circle Text multiline* with 3 Badge effects applied on the left and an Oval example on the right:
Be careful using the Badge OSCs when they're over the Circle Text region — you will need to change the Select Tool to Trim (type T), Blade (type B), or one of the others. Type A to return to the select tool for the timeline.
If you want to, or need to animate the position of the title (with effects) you will need to add another effect to the title that can handle Transforms (or use the "master" Transform parameters... which annoy me...LOL).
*The two lines have the first and second lines selected separately to have different properties like tracking and line-spacing applied...
Hopefully, the two templates should make all the work much more simple...
HTH (let me know what you think after you've had a chance to play with it awhile.)
Almost forgot:
https://fcpxtemplates.com/sdm_downloads/circle-text-kit/