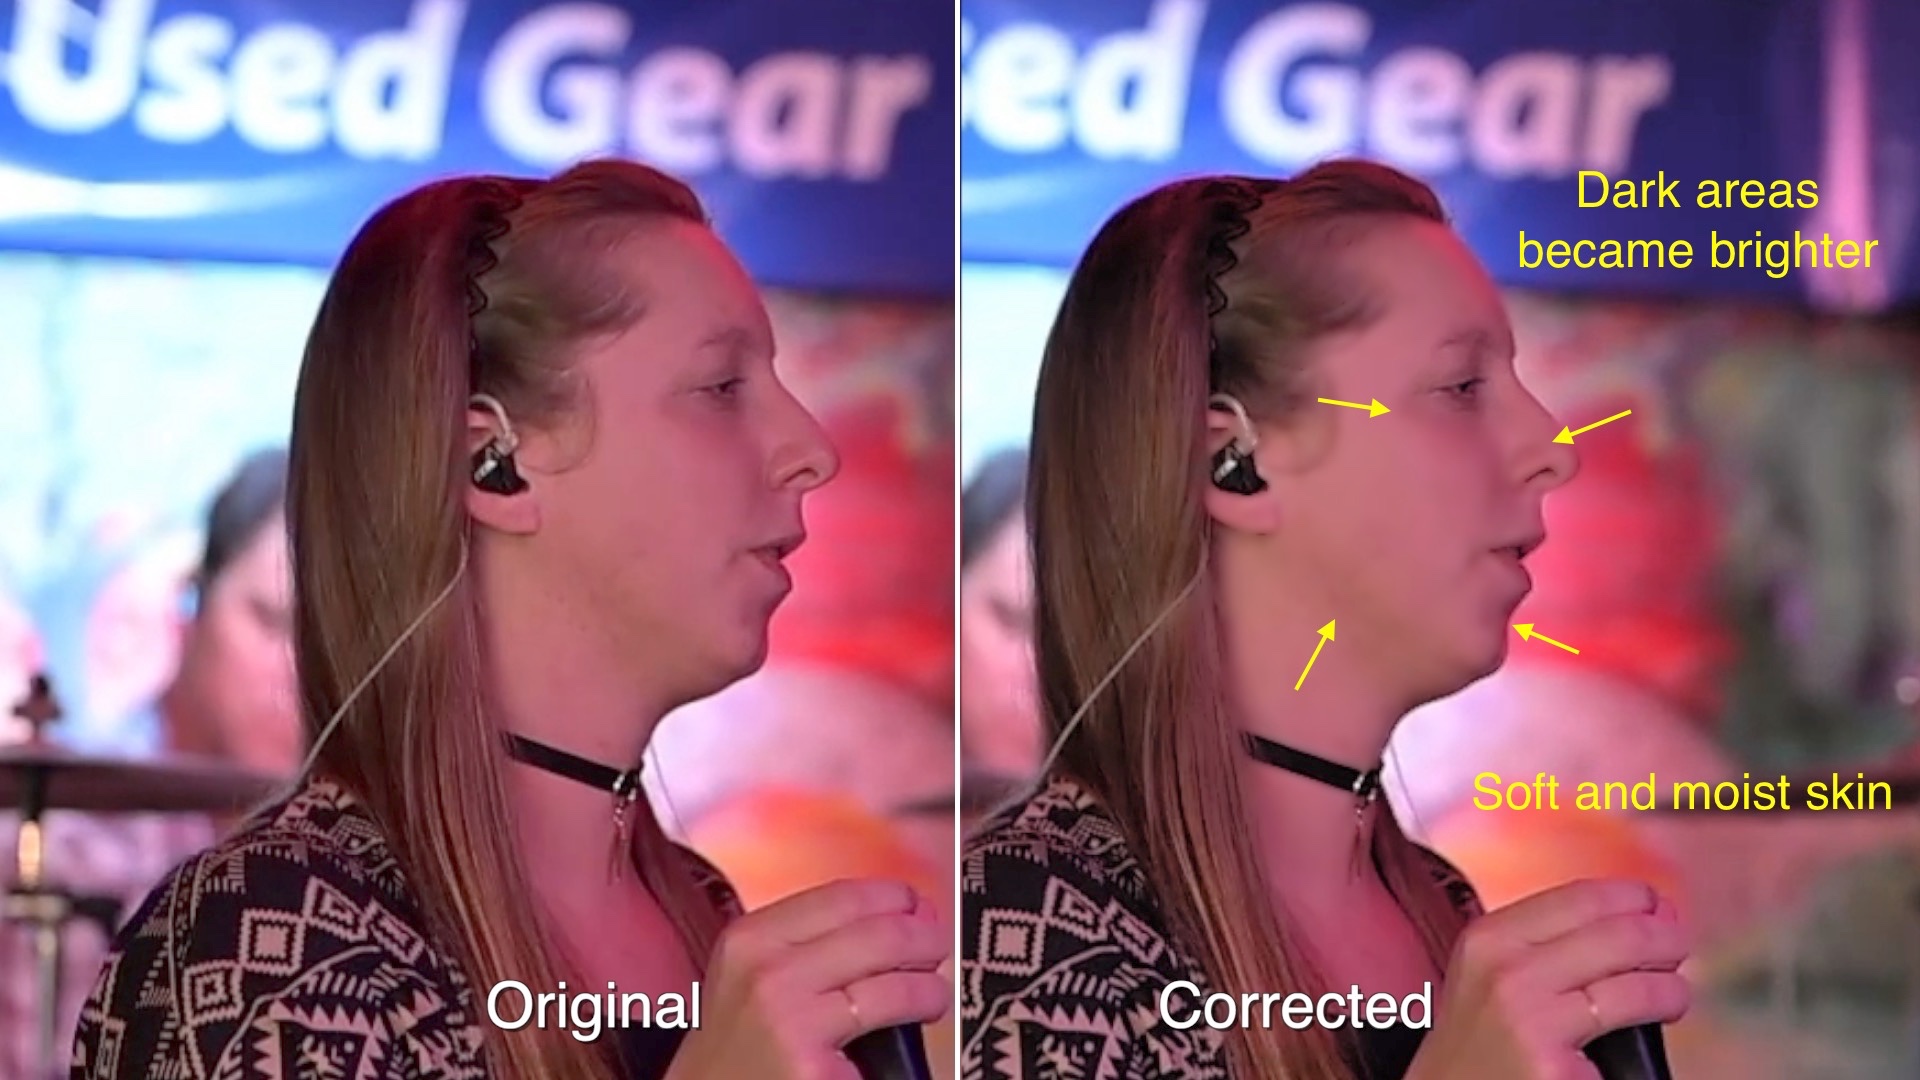
Is there a better way to make the corrected frames look normal?
I always manually correct the face and skin color using only FCP. Learn the features of tracking and color correction, and if you have the patience, you can do it for free.
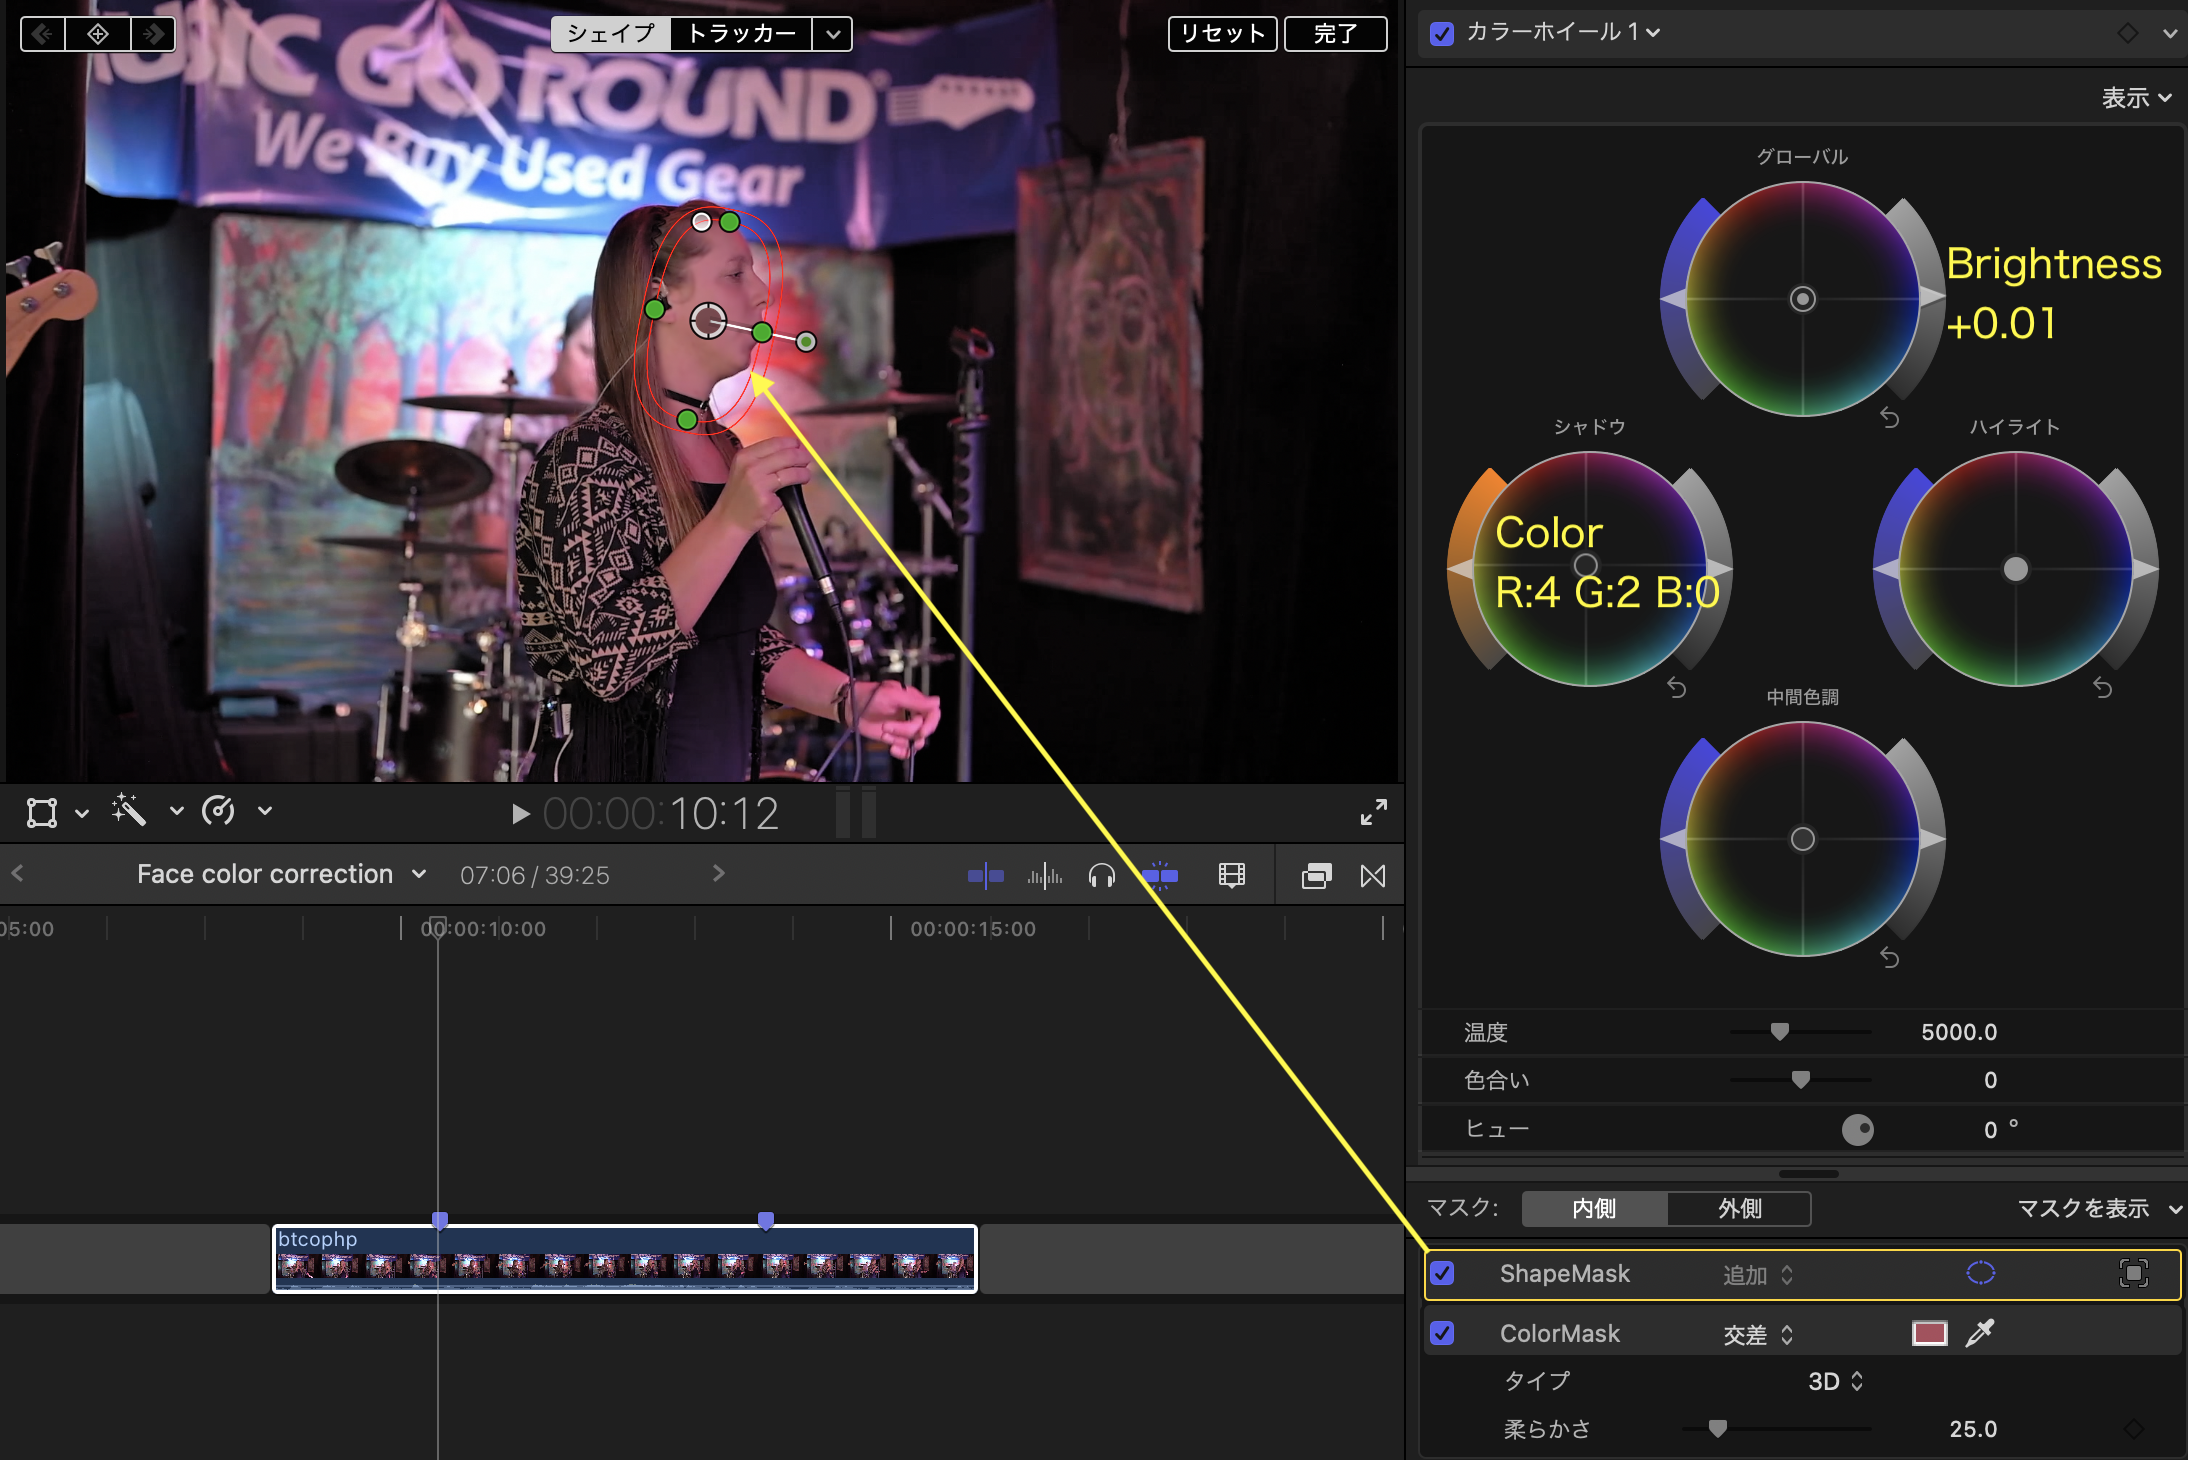
1. Add a color wheel to a clip on the timeline. →Global:Brightness:+0.01, Shadow:Color:R:4/G:2/B:0 →Add a shape mask to the color wheel.
Adjust the blur range of the shape mask displayed in the viewer. →Change the white selected Shape Mask to Tracker. →In order to track facial movements, place the tracker along the contour of your face and cover it up to your neck. See diagram.
2. Analysis. →Create tracking data. →Change the tracker name to “FaceTracker”. →Please do not rely solely on automatic analysis, but manually make as many detailed corrections as possible.
Removing unnecessary keyframes and adjusting the size and shape of the tracker will result in smoother movement.

Apply “FaceTracker” data to the shape mask you added earlier.
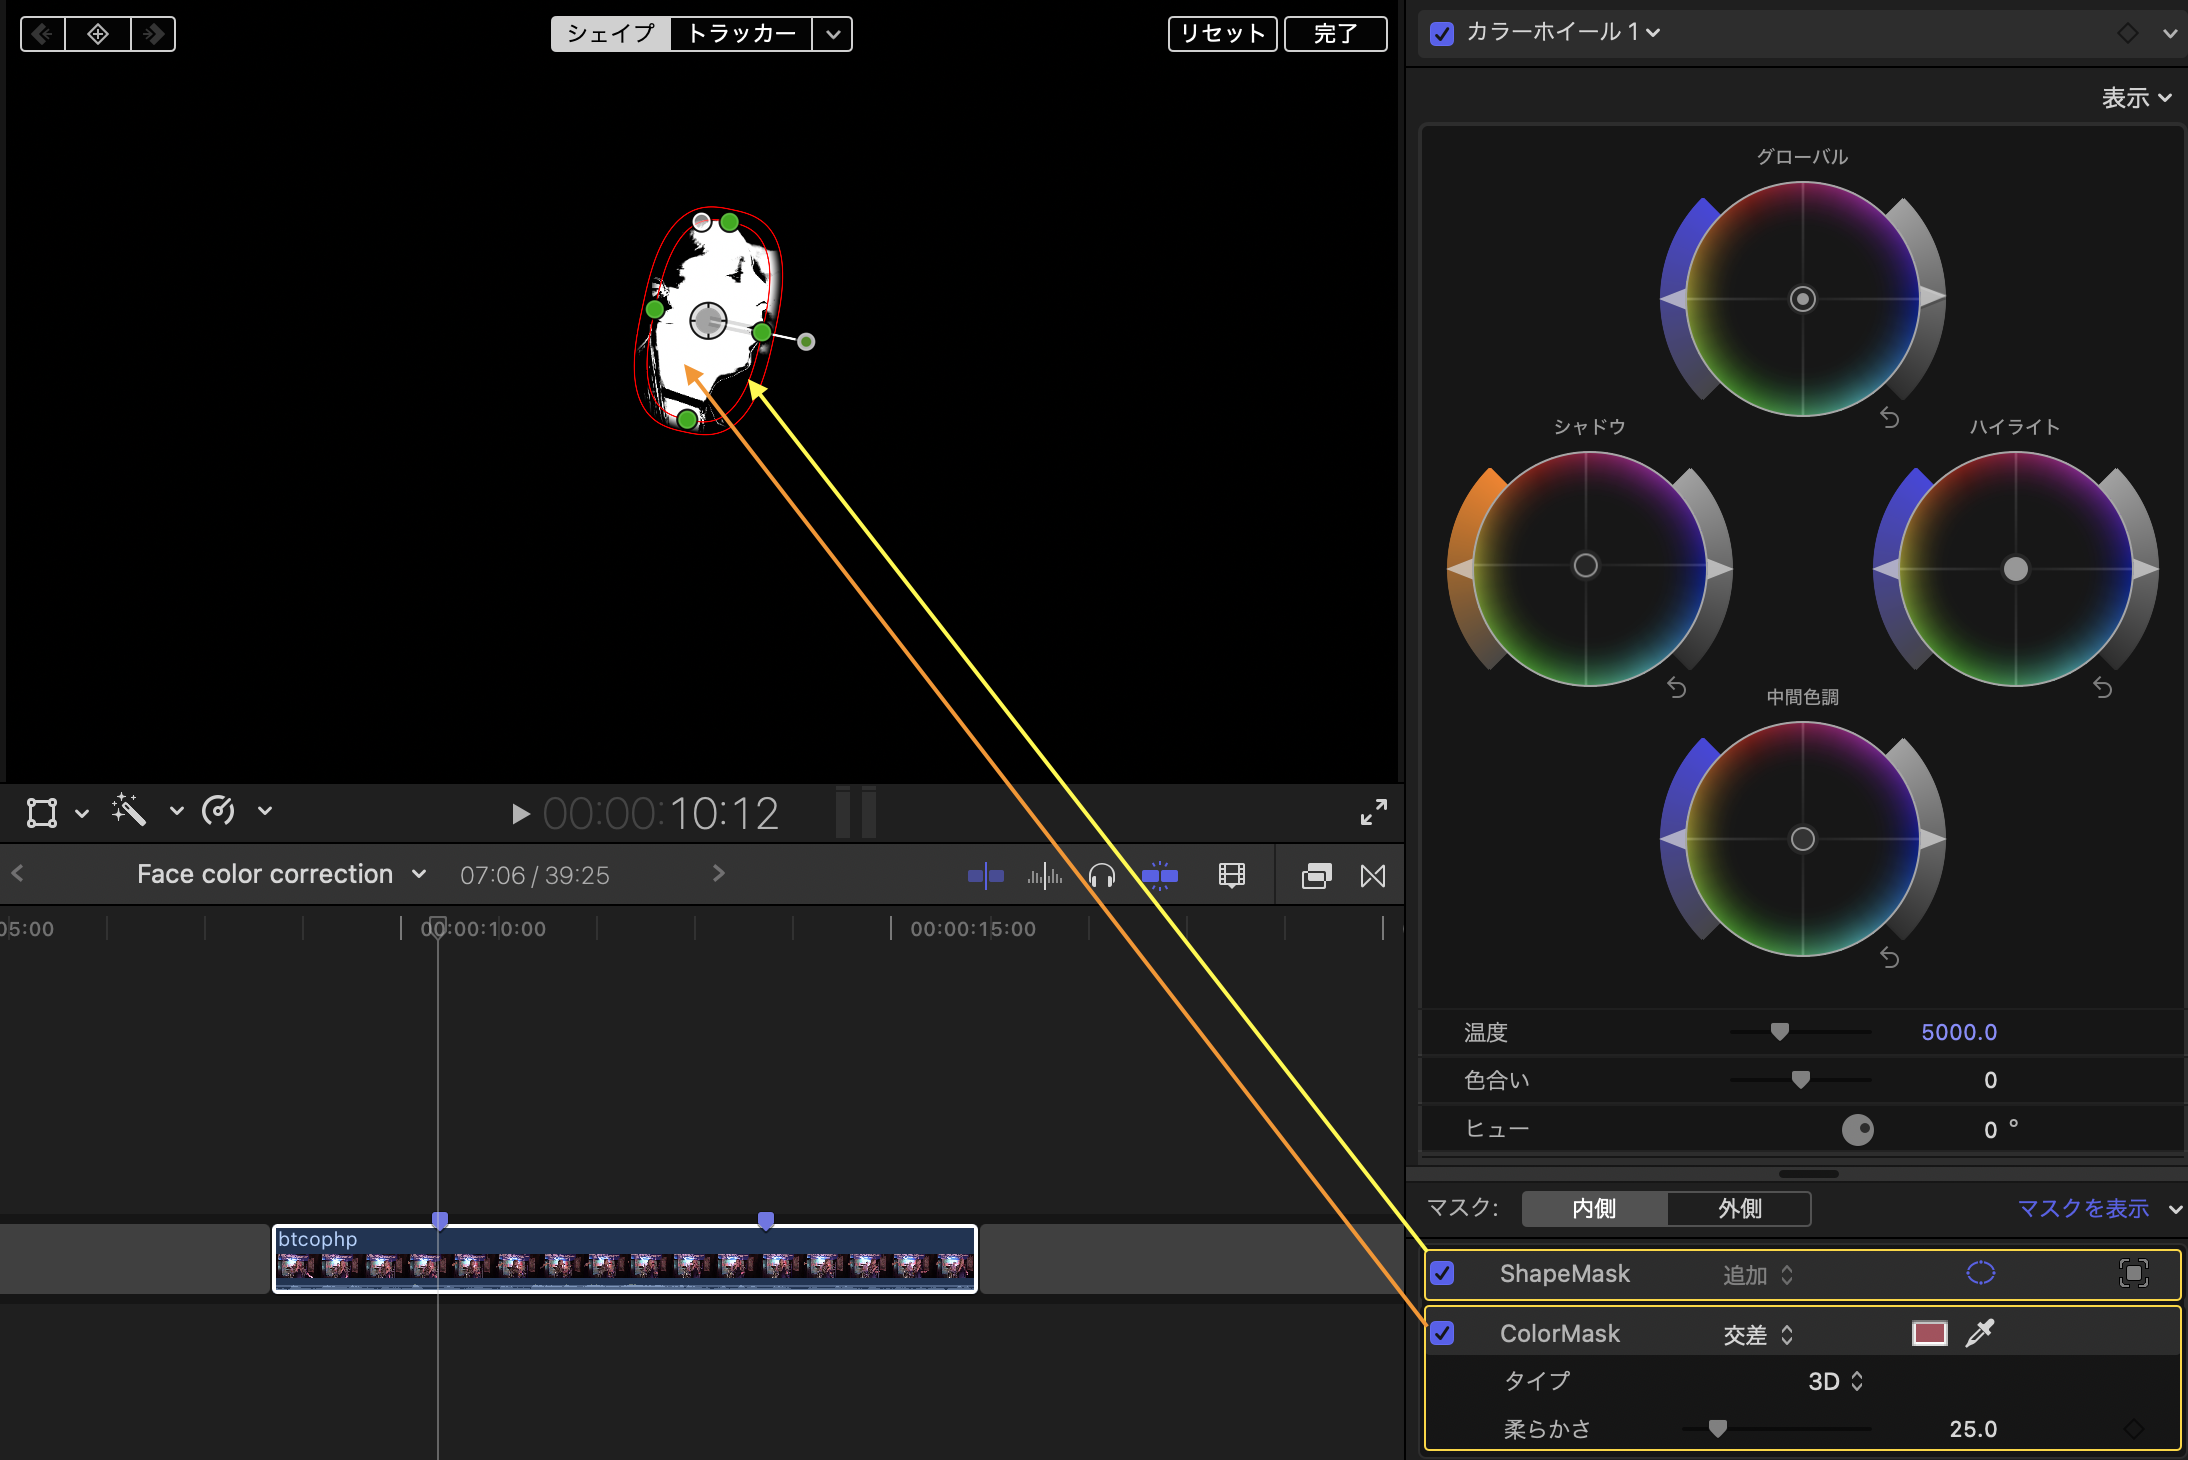
3. Add a color mask to the color wheel. →Extract the skin color of the face using the eyedropper tool.
4. Add the Gaussian effect and adjust the parameters. →Add a shape mask to Gauss and apply “FaceTracker”.
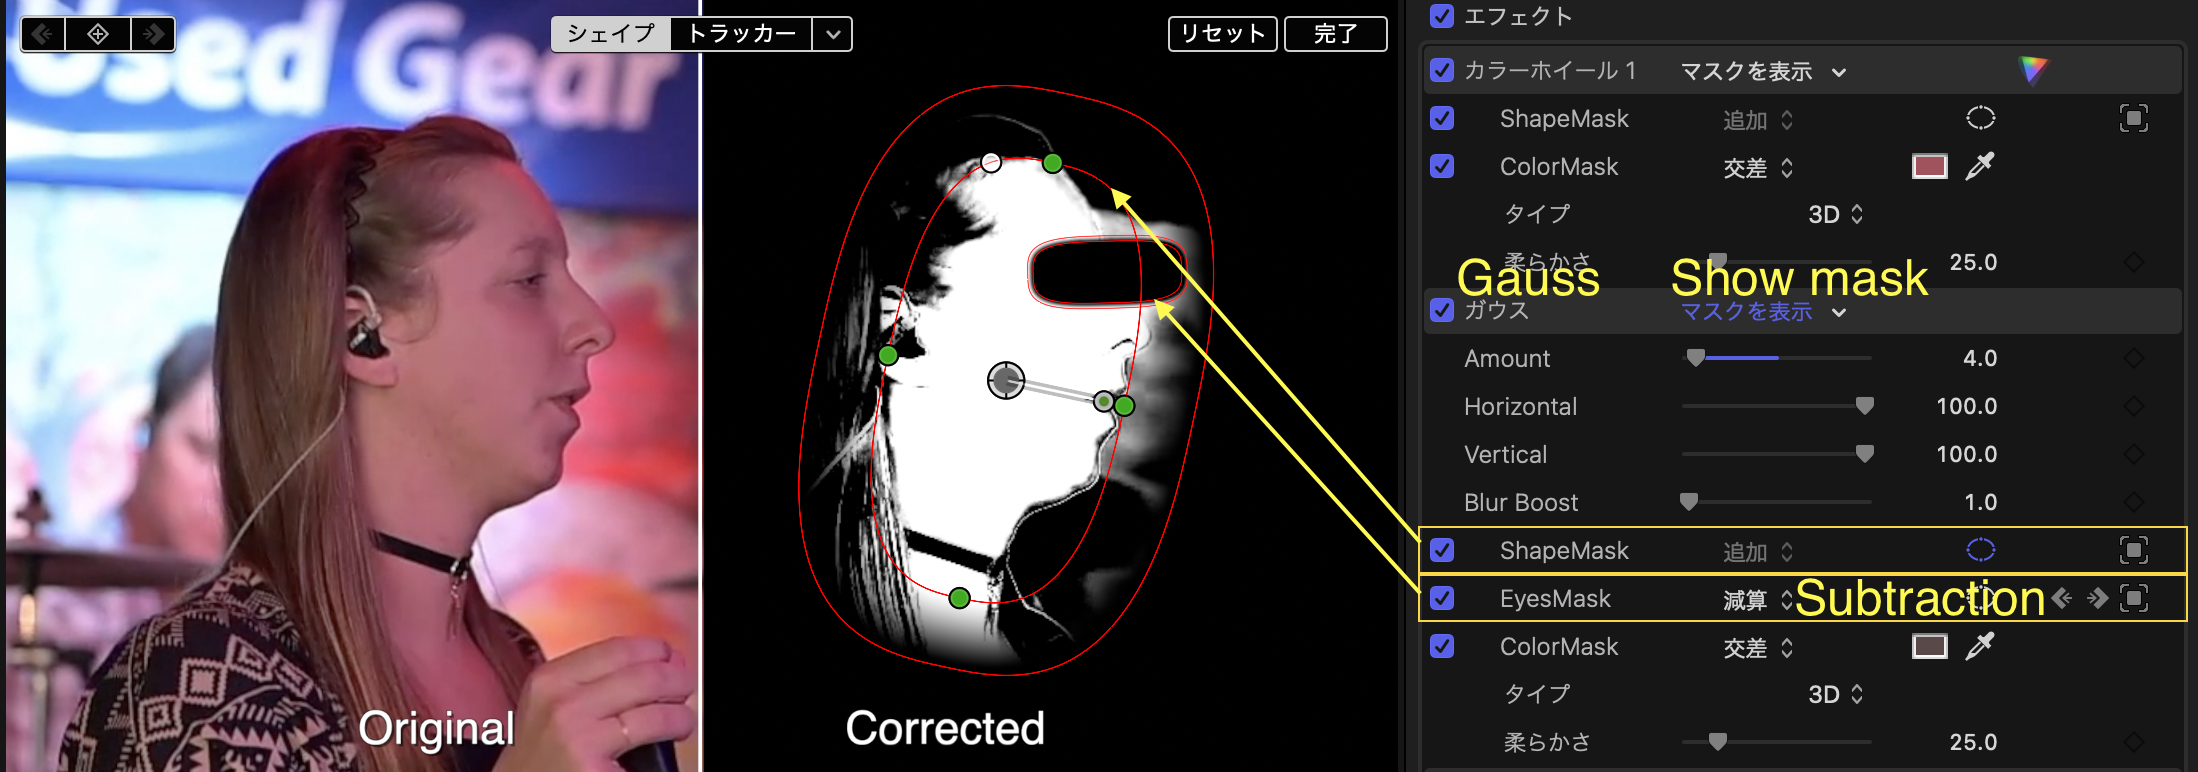
Add a second shape mask. →Name it “EyesMask” and apply subtraction. →Apply “FaceTracker” to “EyesMask”.
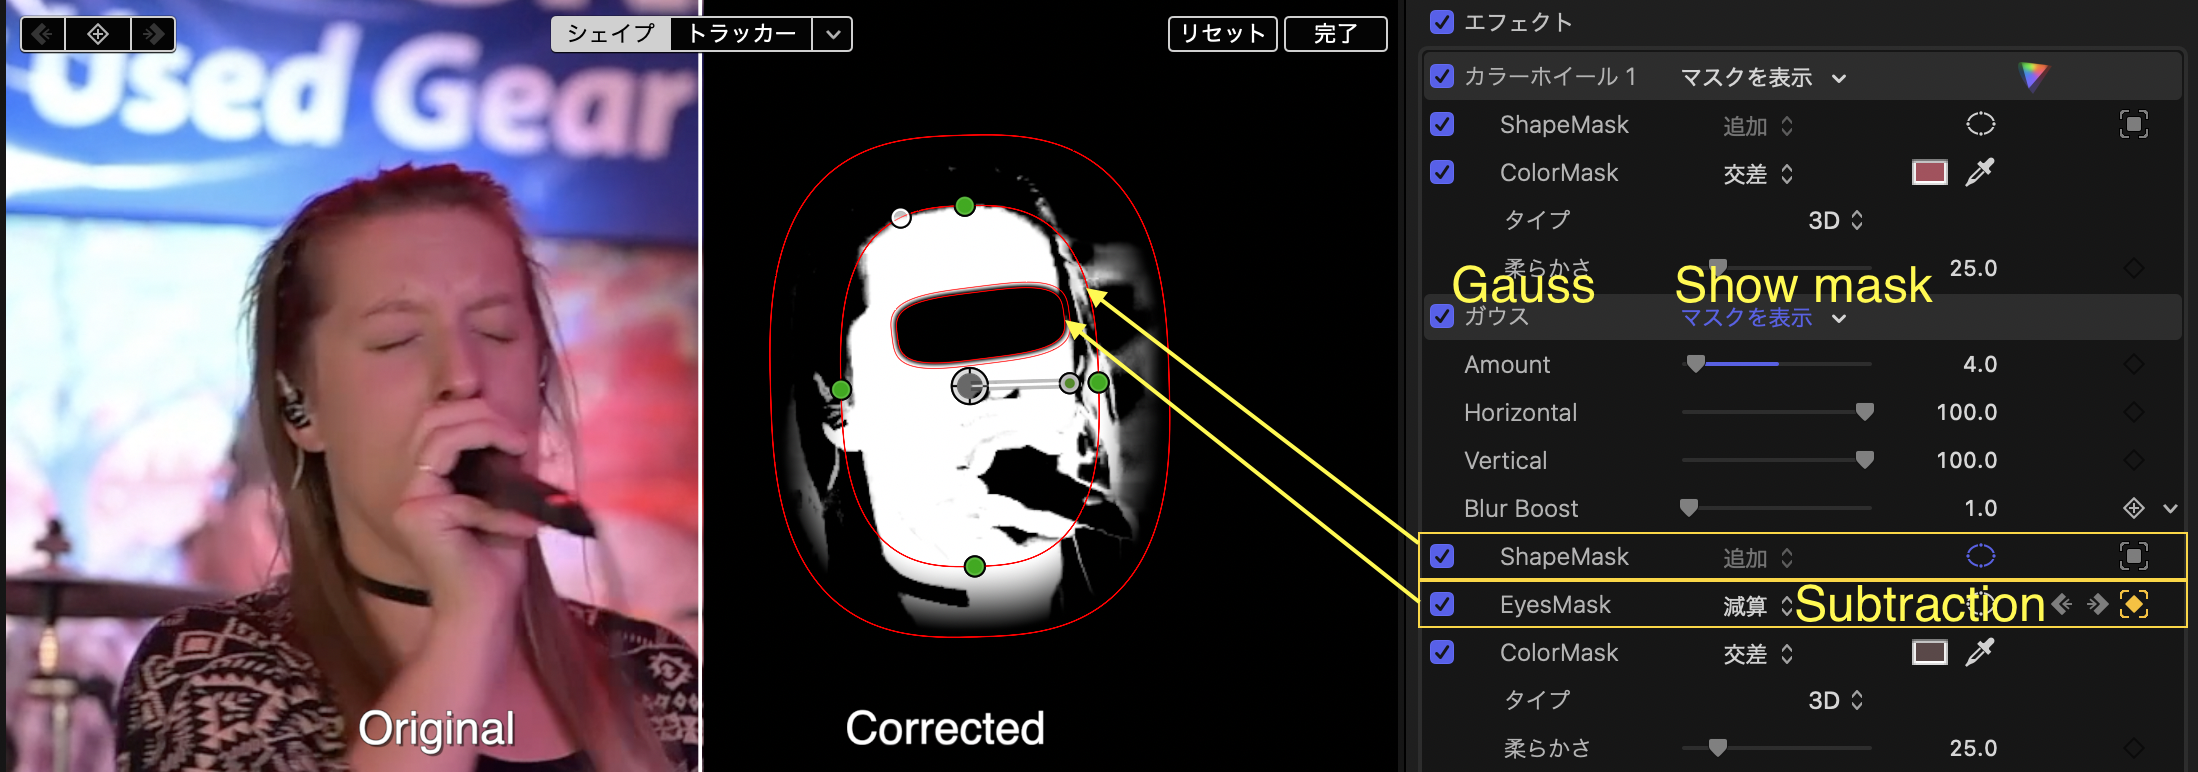

5. “EyesMask” covers only the eyebrows and eyes by adjusting the shape and position using keyframes in the inspector.

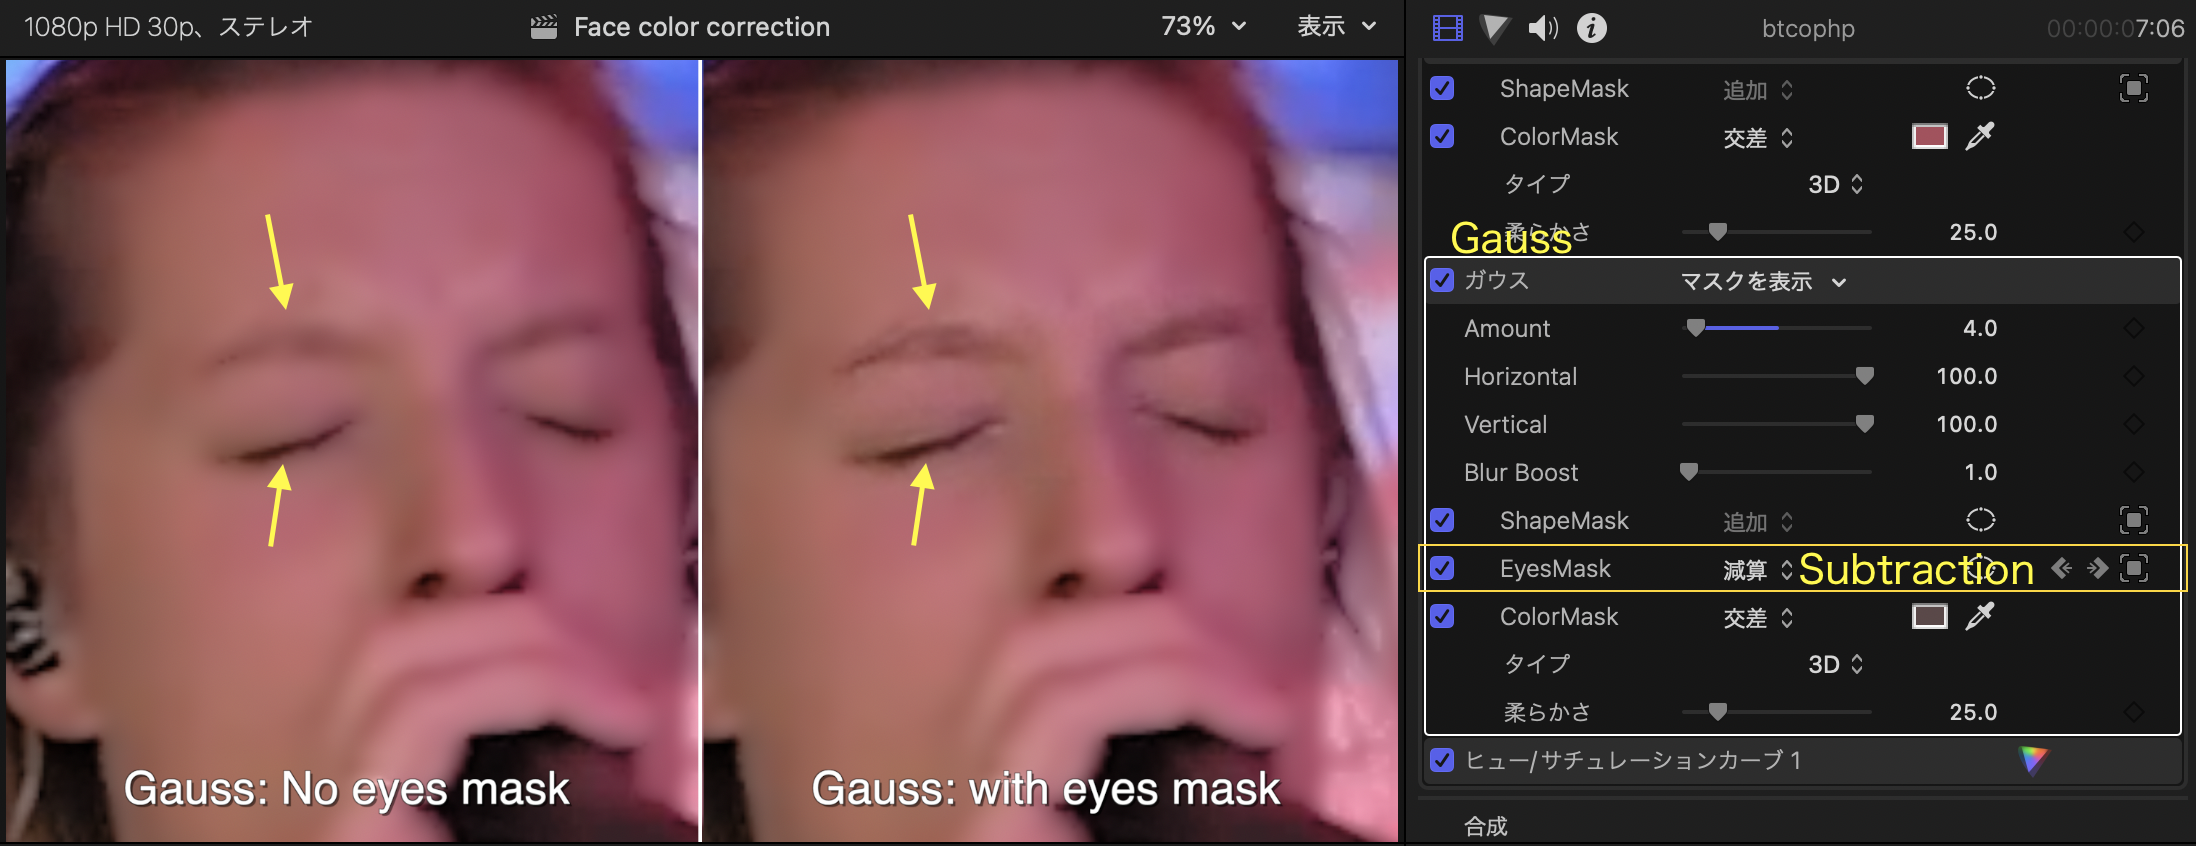
The singer's eyebrows and eyelashes have a small amount of hair and are thin, so it is better not to blur them with a Gaussian. The purpose of "EyesMask" subtraction is not to apply Gaussian.
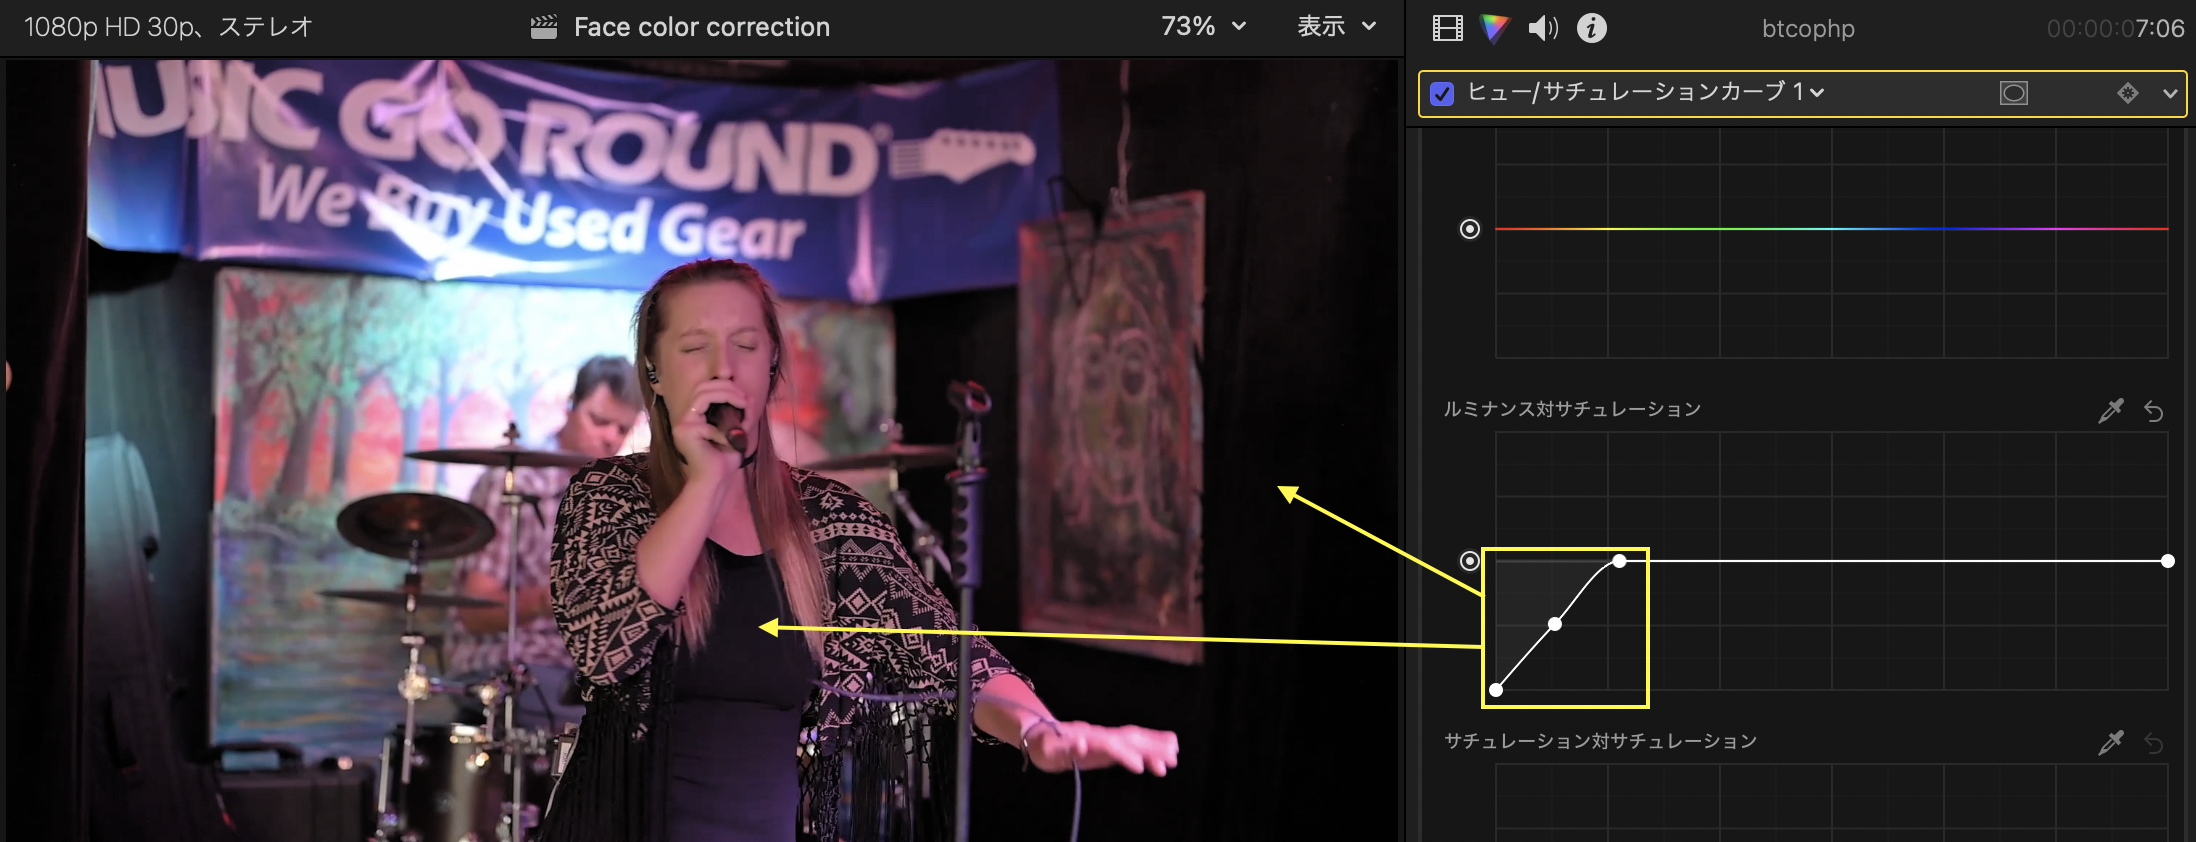
6. Add hue/saturation curve. →Lowers the luminance vs. saturation dark curve to achieve pure black.