The behavior you're experiencing with your emails on your iPhone 14 may be due to the settings and filters you have in place. Here are a few possible reasons why a majority of your emails go to the Archives instead of your Inbox:
- You might have set up specific filters or rules that automatically direct certain emails to your Archives. These filters can be based on various criteria such as sender, subject, keywords, or other attributes. Ruless can only be set or edited on a web browser. Set up rules to filter email in Mail on iCloud.com - Apple Support
- The email client or service you are using on your iPhone 14 might have strong spam filters that automatically detect and move suspected spam or junk emails to the Archives folder. These filters aim to keep your Inbox clean by diverting potentially unwanted or unsolicited emails.
- If you have previously manually moved emails to the Archives, your email client might have learned from your actions and applied similar patterns to future emails from the same senders or with similar content.
Move the email that you want in the Inbox from Junk to Inbox manually. Your one time action will trigger learning for the iPhone and all future mails from that domain ID will arrive at the Inbox.

If your incoming email messages are automatically moved or placed in Bin / Trash / Junk / Archicve, the primary cause could be misconfigured rule / filter, or a setting on your Forwarding and POP/IMAP tab. To resolve this issue, please make sure you haven't created any rule / filters with the action to Delete / Move it that would affect the email messages being moved automatically to another folder..
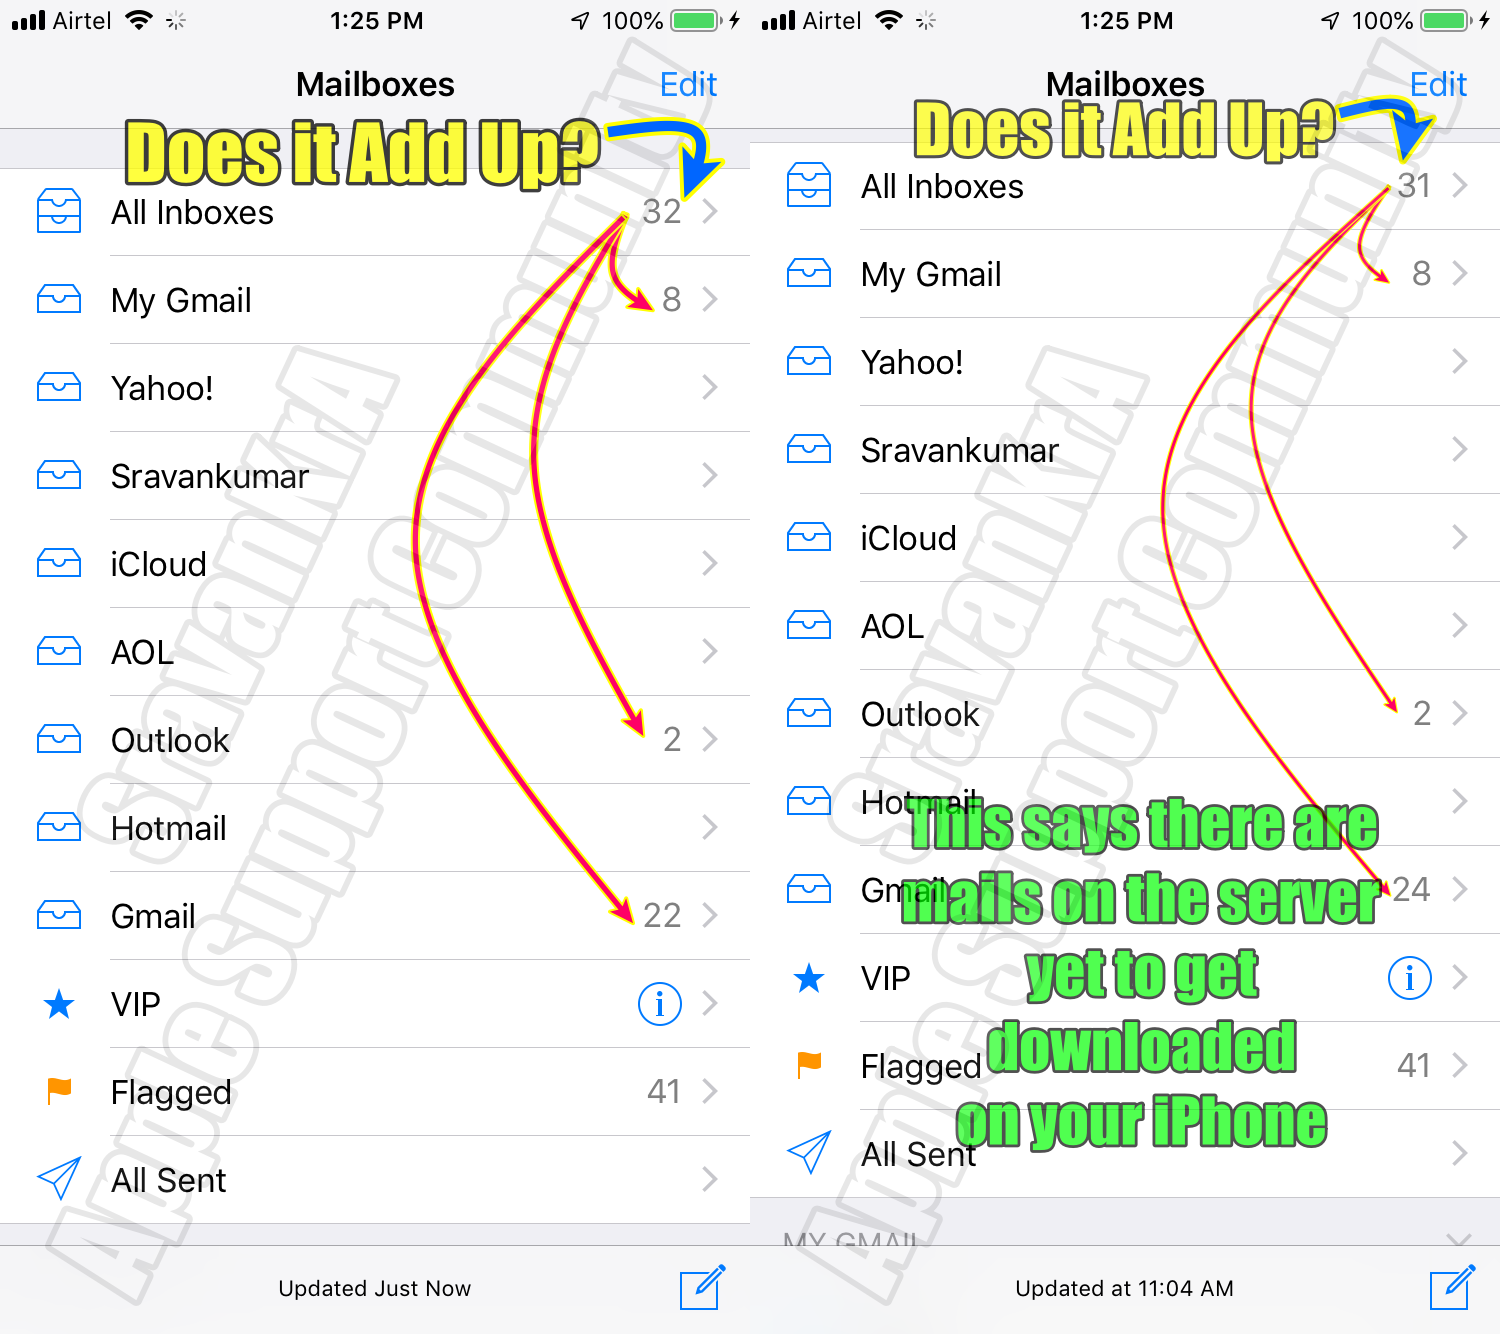
Your emails are not downloaded yet. (Unread mails are on the email client-server)
iCloud - Both Fetch and Push Mail option is available
- Push Mail: Whenever possible the email client will push emails to all your devices.
- Fetch Mail: You need to set How you want it to be fetched, Automatically, Manually, Hourly, Every 30 mins, every 15 mins
- Automatically: will fetch when the iPhone is powered and on WiFi
- Manually: with fetch when you open the email, open Inbox, and swipe down
- You get an email notification as soon as the client-server receives an email and your device is connected to the internet, irrespective of whether the mail is in your device's Inbox or not
Connecting to Wi-Fi is the initial step, followed by establishing an internet connection.
However, it's important to note that connecting to Wi-Fi does not automatically guarantee an internet connection. In the event that you are unable to connect to Wi-Fi, the issue may stem from settings on your iPhone or the router/modem.
On the other hand, if you are unable to establish an internet connection despite being connected to Wi-Fi, the problem is likely related to the settings on your router/modem. In such cases, it is advisable to promptly contact your Internet Service Provider (ISP) for assistance.
Check your WiFi Router / Modem for --> Recommended settings for Wi-Fi routers and access points ...
For your Internet connection.
- Over Cellular: contact your Carrier (Cellular Service Provider). The agency that issued the SIM to you
- Over WiFI: Contact your ISP (Internet Service Provider), the agency that provided the Internet Service on your Modem/Router to you
However --> Connect iPhone to the Internet - Apple Support
This is a case where the Red badge is because there are unread mails on the server not downloaded on your iPhone yet. Open each mail box and let the mails get downloaded on your iPhone.
See the Pic below which demonstrates what I just said.