Border choices are an either-or choice for the selected group of cells.
The two choices to the right will apply borders to the external frame of the group OR the internal borders of the group.
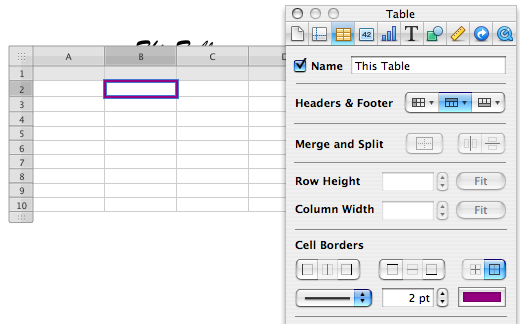
For the result in the image, use the directions below:

Open the Table Inspector.
Select cell B2.
In the Inspector:
• Click the last button to the right (all outside borders)
• Click the pop-up menu ('Thin") and choose a border style.
• Set the stroke thickness using the stepper, or by typing the size into the box.
• Click the Color Well then choose a colour.
Results should be as below:
With B2 still selected:
• Press option-command-C (ie. hold down the option and command keys, then tap the C key) to Copy Style*
• Press shift and Click on cell C7 to expand the selection to B2:C7 **
• Press option-command-V to Paste Style
Result will be as shown in first image.
Regards,
Barry
* Copy Style and Paste Style are also found in the Format menu.
** If the cells are empty, you can also drag the Fill control (small circle at bottom right of selection) to expand the selection. Not a useful step if there is data in the cells though, as this will also Fill the data or formula down the column(s) or right along the row(s)
B