The file name is the name that the file had when imported into iPhoto. Trying to recover a delete photo is not a normal operation on any platform, Mac or PC.
Normally you should never have to use Spotlight to locate a photo in an iPhoto library for use outside of iPhoto. The following is from a post by Terence Devlin on accessing photos for use outside of iPhoto. It's the definitive treatise on the subject.
The following is from Terence Devlin’s post in this topic on file access for use outside of iPhoto - where are the photos saved on my PC?: Apple Support Communities. It’s the definitive treatise on the subject.
There are many, many ways to access your files in iPhoto: You can use any Open / Attach / Browse dialogue. On the left there's a Media heading, your pics can be accessed there. Command-Click for selecting multiple pics.

(Note the above illustration is not a Finder Window. It's the dialogue you get when you go File -> Open)
You can access the Library from the New Message Window in Mail:
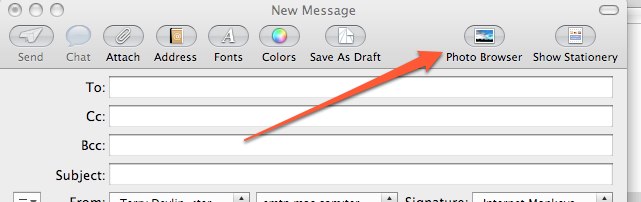
There's a similar option in Outlook and many, many other apps. If you use Apple's Mail, Entourage, AOL or Eudora you can email from within iPhoto.
If you use a Cocoa-based Browser such as Safari, you can drag the pics from the iPhoto Window to the Attach window in the browser.
If you want to access the files with iPhoto not running:
For users of 10.6 and later: You can download a free Services component from MacOSXAutomation which will give you access to the iPhoto Library from your Services Menu.
Using the Services Preference Pane you can even create a keyboard shortcut for it.
For Users of 10.4 and 10.5 Create a Media Browser using Automator (takes about 10 seconds) or use this free utility Karelia iMedia Browser
Other options include:
Drag and Drop: Drag a photo from the iPhoto Window to the desktop, there iPhoto will make a full-sized copy of the pic.
File -> Export: Select the files in the iPhoto Window and go File -> Export. The dialogue will give you various options, including altering the format, naming the files and changing the size. Again, producing a copy.
Show File: a. On iPhoto 09 and earlier: Right- (or Control-) Click on a pic and in the resulting dialogue choose 'Show File'. A Finder window will pop open with the file already selected. 3.b.
b: On iPhoto 11 and later: Select one of the affected photos in the iPhoto Window and go File -> Reveal in Finder -> Original. A Finder window will pop open with the file already selected.