This is achieved by using ACLs (access controls). Normally, a folder is assigned a parent ACL and this set of permissions is cascaded through all sub folders. You are looking to do something slightly more advanced. This can not be solely accomplished from the File Sharing pane but we will start there.
First, I would encourage you to create groups and set your permissions based on groups. If you use users, and you need to add people, you will be forces to propagate permissions each time you change users.
So in addition to your description above, create Group1 and place User 1 in that group. Then create Group2 and place user2 in that group.
Now, assuming you have created the share, setting an ACL at the root of the share may make no sense. However, assuming that you have more than just /ShareRoot/Folder1 and /ShareRoot/Folder2 in the share, setting a parent ACL probably makes sense.
Select File Sharing. Select your Share Point and press the Pencil button to edit. Press the + button to add two additional ACEs (access control entries) to the sharing pane. Set the first to Group1 with read write and the second to Group 2 with read write.
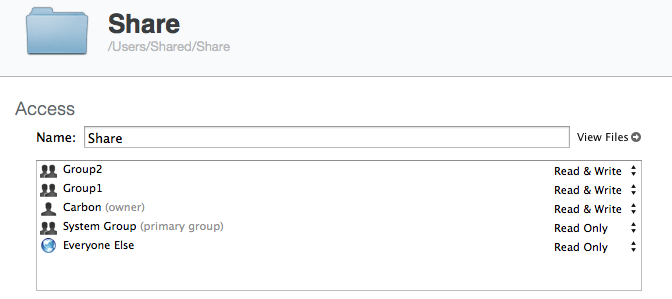
Now this is not enough. This will handle the entire share, allowing members of both groups to have read and write access to ALL children and descendants. So now let's lock down the sub folders.
In Server.app, select you server from the top of the left column. Click the Storage tab on the right pane.
Now, drill down to find your parent share folder and select it. From the Gear menu button, choose Propagate Permissions... and apply your ACL set above to all current content. Yes, this will open all folders to the members of Group 1 and 2. We will restrict.
Once the propagate is done, drill into your share folder and select the folder you want to protect.
You want to prevent User 2 to be removed from access of Folder 1. If so, select Folder1 and choose Edit Permissions from the Gear button menu. When the sheet appears, choose Make Inherited Entries Explicit from the Gear button menu.
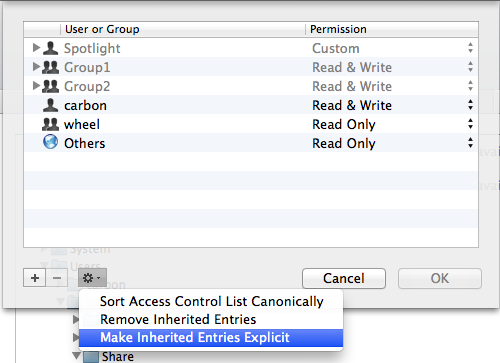
This will change the ACLs in the list from gray to black. This breaks the inheritance from the parent share folder. Now remove Group 2 from the list AND change the Others permissions to NONE. Press OK to return to the Storage tab.
Now, with Folder 1 still selected, go back to the Gear Button menu and choose Propagate Premissions for this folder and check all boxes (really, you just need acl and other)

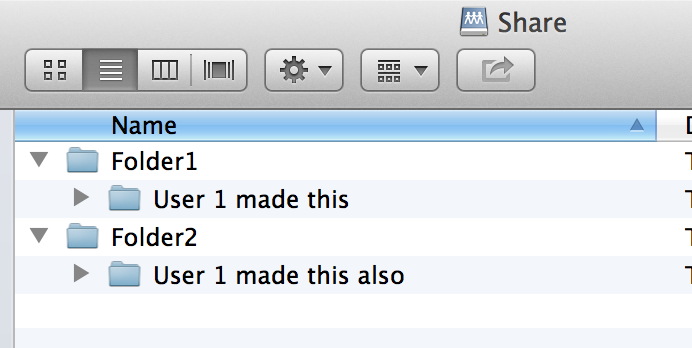
Now test from a workstation. User1 (and anyone else in the Group1 group) will see this:
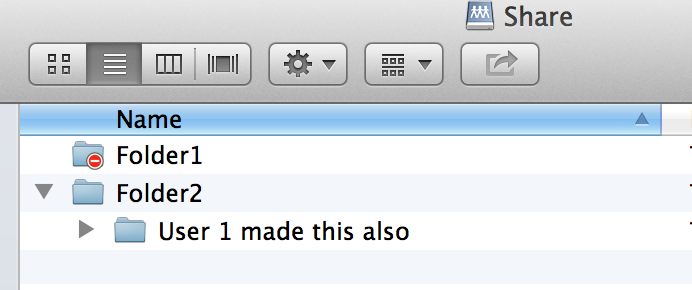
User 2, and anyone in the Group2 group will see this:
Now, this assumes that there will be other data in the share. If folder one and folder two are the only folders, then you could reverse this process. Instead of giving group1 and group2 access to the parent and then removing group 2 from folder 1, you could give group 1 access to the parent and then add group 2 to folder 2.
Hope this helps. Permissions are a tough thing for new admins. The tools are all there, they are just in multiple locations with different abilities.
R-
Apple Consultants Network
Apple Professional Services
Author "Mavericks Server - Foundation Services" :: Exclusively available in the iBooks store