Want to highlight a helpful answer? Upvote!

Did someone help you, or did an answer or User Tip resolve your issue? Upvote by selecting the upvote arrow. Your feedback helps others! Learn more about when to upvote >

Looks like no one’s replied in a while. To start the conversation again, simply ask a new question.

I created an encrypted disk image, but I can't add any files to it.

I had a file which I wanted to have password-locked, so I went to Disk Utility > File > New > Disk Image from Folder.
I selected the folder, saved it on my desktop, chose image format compressed and 128-bit AES encryption (it was reccomended).

I now need a password to open the folder, but even after opening it I can't add any new files to it.

MacBook Pro with Retina display, iOS 7.0.3

Posted on Apr 22, 2014 10:08 AM

Reply
20 replies

Apr 22, 2014 10:46 AM in response to mennofromnld

Once it's opened with the password, I can add files to an encrypted disk image (sparse bundle) no problem with that here. Do a Get Info and see if it's locked. I think a sparse bundle won't have that issue if it's locked, but a sparse image will. At least, that's the way those two behave here.


If you find that the previous information is correct, and you need to make a new one, I would recommend making a sparse bundle this time. That will allow it to be expandable, as more room is required over time.

Apr 22, 2014 11:11 AM in response to mennofromnld

Unlock it if it's locked.


Or open Terminal in Utilities and just drag in the disk image. Copy the resulting path from the output.


Then enter


chflags nouchg <path to file or folder you just copied> Do not use the < > and be sure to leave a space after nouchg


Then hit enter/return


If this doesn't workm then use the following instead sudo chflags nouchg


You will be asked for your admin password, which won't appear in any form as you type it in. There will be a scary warning. Just continue.

Apr 23, 2014 1:56 AM in response to WZZZ

I've tried all the things above.
When selecting a new image in Disk Utility I can create an encrypted folder with I can add files to using finder, but when I try and open this folder from my desktop, I get the chance to type in my password (it is the correct password) but then nothing opens. If I open the other encrypted folder I have, which I can't add files to, it opens straight away after typing in the password.
Why won't it open?

Apr 23, 2014 6:08 AM in response to mennofromnld

When selecting a new image in Disk Utility I can create an encrypted folder

At first glance, I think the problem is that you are creating an encrypted folder. You should first be creating a sparse disk image bundle into which you move the items you want to protect. You are not creating an encrypted folder.


User uploaded file


It's very difficult to say what's going on, since I don't know the exact details of how you are going about doing all this.


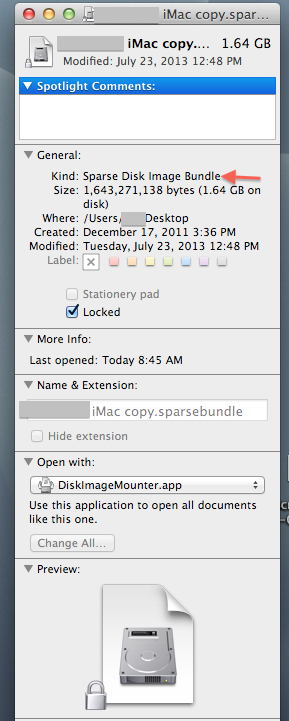
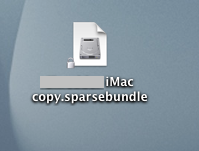
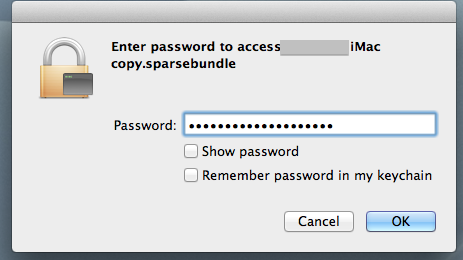
This is what mine looks like before opening it (temporarily copied to the Desktop--I don't keep it there, and then after giving the password and opening it, at which point it turns into a disk image. When I double-click on the disk image, its contents appear (not shown.)


Before entering password.

User uploaded file


User uploaded file

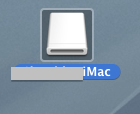
Disk Image/double-click to open. You eject this when finished using it.

User uploaded file


If you want to get any further help with this, I suggest you tell me exactly, step by step, from start to finish, eveything you have done.

Apr 23, 2014 6:33 AM in response to WZZZ

Thanks for the help, I really appreciate it.
Okay so here are the steps:


- I go to disk utility and selected "new image" at the top.
- I then fill in this information (as an example):


User uploaded file


Then I get this screen:
User uploaded file


I can then see it on the left on the disk utility.


User uploaded file


I add files to it using the finder application, after which I eject it.
User uploaded file

Then, when I open it from my desktop I fill in my password:


User uploaded file

But then it wont open tha actual folder.


Here is the "get info" of the folder:
User uploaded file

Apr 23, 2014 7:01 AM in response to mennofromnld

OK, after creating the sparse bundle, do not try to do anything with it while it's still in Disk Utility. Do this instead: in Disk Utility, first eject the Disk Image. (Right-click to bring that option up.)


User uploaded file


Next, Remove the sparse bundle from DU.


User uploaded file


Now, find the sparse bundle saved to the Desktop and open it from there with your password. After it's open, you should be able to move whatever you want into it. When finished doing that, eject the disk image. You can leave the sparse bundle on the Desktop, or copy it to your Documents folder (that's where I keep mine), then trash the one on the Desktop.


User uploaded file


How does that work now?

Apr 23, 2014 7:21 AM in response to WZZZ

I still can't open the file from my desktop, nor after I put it in my documents and try open it from there.
The only way to see what's inside is to type in the password and then to click on "Disk Image" under Devices.


I can't upload videos onto here, so here is a link to what happens when I try to open the folder:


https://www.youtube.com/watch?v=TVqUnb_ksQ0&feature=youtu.be

Apr 23, 2014 7:36 AM in response to mennofromnld

What does it look like unopened on the Desktop (screenshot)?


Maybe it's a flaky key, or keys, on the keyboard responsible for the problem. Try this: create a brand new test sparse bundle.Trash the old test one. Don't use any of the same characters you've been using before for the password. Instead, just for a test, use something very simple like 1 2 3 or a b c. Don't put anything in it, just see if it opens properly from the new password. Also, are you trying to put items inside the sparse bundle or inside the disk image? It's the latter where they go.


User uploaded file

I created an encrypted disk image, but I can't add any files to it.

Welcome to Apple Support Community
A forum where Apple customers help each other with their products. Get started with your Apple ID.