Hi fabianadellave,
Welcome to the Support Communities, and thanks for your question. I understand you are experiencing latency when recording from an external microphone into your new iMac.
- The first thing I would suggest is to unplug your external microphone and all external audio devices and test using the internal microphone on your iMac.
- Next, check the settings in System Preferences > Sound for your Microphone (input) and Speakers (output).
- For this test, make sure the Input Device is set to Internal Microphone (Built-in)
- Make sure the Output Device is set to Internal Speakers (Built-in)
In Garageband, record a vocal track with no effects.
- First, create a new project.
- Use Audio - Record using a microphone or line input as the template for the project.
- Make sure there are no effects like echo or delay enabled.
- Arm the track (set for recording), then hit the record button and record a couple of sentences.
When you play the track back, do you hear any delay?
Fabianadellave, if you get a chance to try this initial test of your computer's hardware, please respond back with the results. Also, if you can answer these questions, it would give us a better understanding of your unique situation.
- What microphone are you using?
- Do you have an audio interface you can work with instead of plugging the microphone directly into the 3.5mm headphone jack?
- Are you using an adapter on your external microphone to for this size input?
Once we confirm that the internal microphone is working as expected, then we can address your external microphone. For best results, use a microphone that has a standard XLR cable. Plug the XLR cable into an audio interface, which connects to the USB port of your iMac.
Take a look at these resources for recording vocals in Garageband:
GarageBand 10 User Guide - Record Audio
You can record your voice, an acoustic instrument, or any other sound using your computer’s built-in microphone or a microphone connected to your computer. You record sound from a microphone to an audio track.
Before you start recording audio, do the following:
-
Connect a microphone to your computer and make sure the microphone is turned on and working.
-
Connect an electric guitar to your computer and make sure the guitar is working.
-
Select the audio track you want to record to, or add an audio track. Be sure to set the input source, input volume level, and monitoring for the track.
-
Set the project bit depth, which is the number of digital bits each sample contains. Recording at a bit depth of 24 bits is recommended for most situations and is the default setting.
-
Tune any instruments that are connected to your system to ensure that your external instrument recordings are in tune with any software instruments, samples, or existing recordings in your project.
-
Select the track you want to use, then click the Smart Controls button  in the control bar.
-
Click the Inspector button  in the Smart Controls menu bar to open the Smart Control inspector.
-
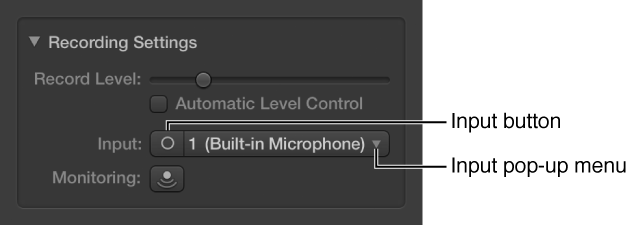
In the Recording Settings section, click the Input button to switch between a stereo input channel pair and a mono input channel, then choose the source from the Input pop-up menu.
-
Select the track you want to use, then click the Smart Controls button in the control bar.
-
Click the Inspector button in the Smart Controls menu bar to open the Smart Control inspector.
-
In the Recording Settings section, adjust the Record Level slider.
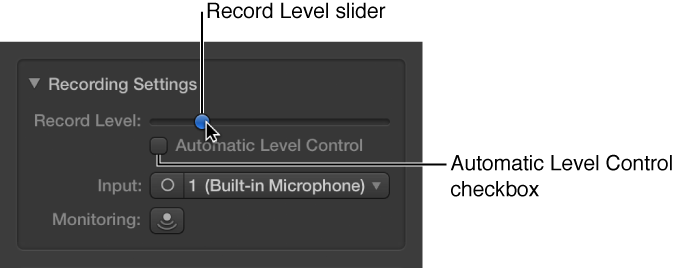
You can also select the Automatic Level Control checkbox to have the recording level adjusted automatically. It lowers the level to prevent feedback, and raises the level if too low.
Do one of the following:
-
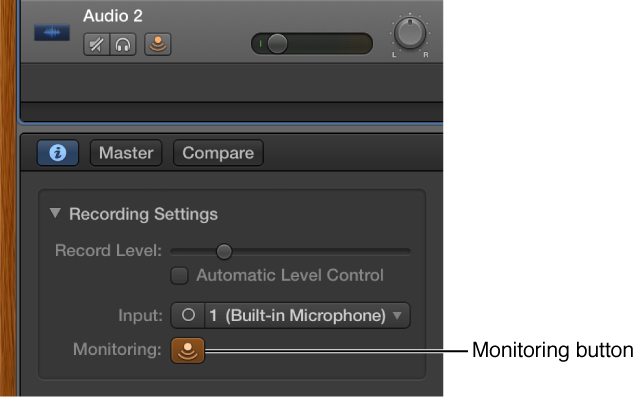
Click the Monitoring button  in the track header of the track you want to use.
-
Select the track you want to use, then click the Monitoring button in the Recording Settings section of the Smart Control inspector.
You can also select the Feedback Protection checkbox to avoid feedback while you play.
You add tracks to a project to hold your recordings, loops, and other material. When you add a track, you can choose the track type, format, input source (for audio tracks), and output. The options in the New Track dialog vary, depending on the type of track you’re creating.
The new track appears in the Tracks area.
-
Do one of the following:
-
Select the track type in the upper part of the New Track dialog.
-
For audio tracks, choose the input source from the Input pop-up menu.
-
Do any of the following:
-
To turn on monitoring for audio tracks: Select the “I want to hear my instrument as I play and record” checkbox.
-
To record-enable audio tracks: Select the “Prepare new audio tracks for immediate recording” checkbox.
-
To change the input device: Below the Input pop-up menu, a line of text shows the current input device. Click the arrow next to the text, then change the device in the Audio preferences pane.
-
To change the output device: Below the Output pop-up menu, a line of text shows the current output device. Click the arrow next to the text, then change the device in the Audio preferences pane.
-
Click Create.
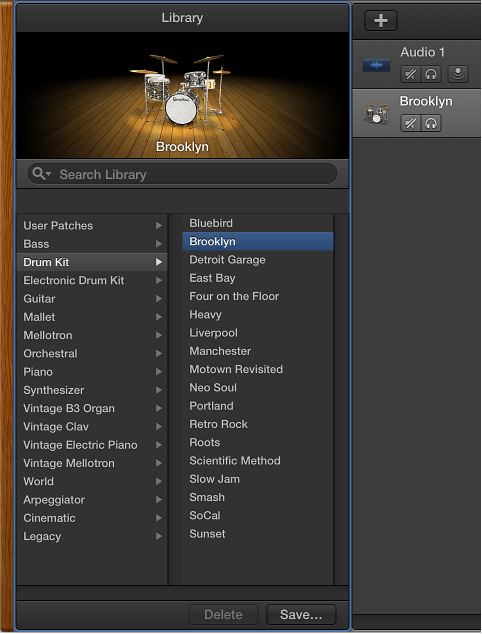
The new track appears in the Tracks area, and the Library opens so you can choose a patch for the track.
Hope that helps ...
