How can I remove a little dot that recorded on my videos in the same exact spot?

I have a little dot that recorded on my videos in the same exact spot. Its so annoying but I don't want to redo the job so I was wondering if there is a way for me to remove it or blemish it out or something in FCP. I guess the sense was dirty or something. Can anyone help me please? Ill attach a pic for you to see what I mean.User uploaded file

MacBook Pro (Retina, 15-inch, Mid 2015), OS X El Capitan (10.11.3)

Posted on Apr 29, 2016 10:35 AM

Reply
22 replies

May 2, 2016 12:11 PM in response to IVTC

For the most part, since the spots do not move in the frame, it simplifies things slightly. When the camera pans subjects into the view in conflict with the spots, that's where you'll have to do some keyframing.


For the clip you posted, I would recommend using a Blur > Gaussian Blur. Apply it to the clip and turn down the Amount so you can still see the dark marks. Mouse over the View Masks label on the Gaussian title bar in the inspector, a "mask" icon (rectangle with a dashed line circle) will appear. User uploaded fileClick on that and select Shape Mask. This will add one shape mask to your clip. You can add AS MANY shape masks as you need -- but keep it as simple as possible (render times, etc.) Five or six for the worst areas will work just fine. When you add the first one, find the worst spot to cover. Size the mask down to just fit over the dark spot. Adjust the Feathering ring down as well - you want to keep these pretty "tight" for the mask and slightly loose for feathering.
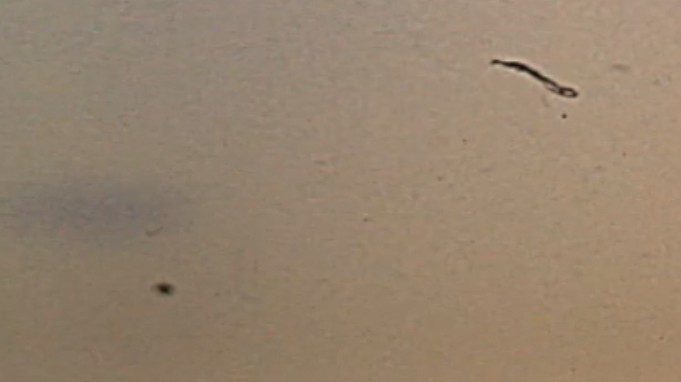
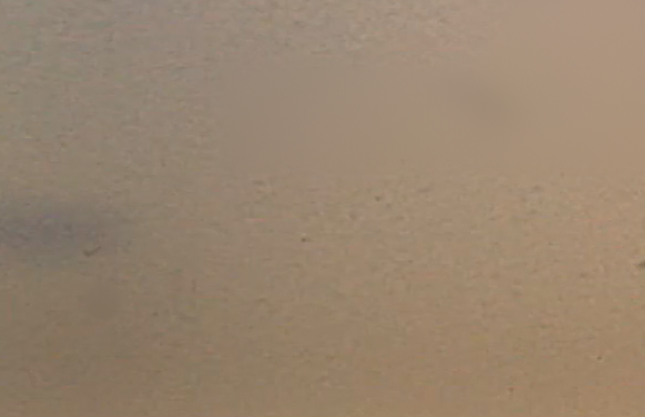


(before — after)

User uploaded fileUser uploaded file


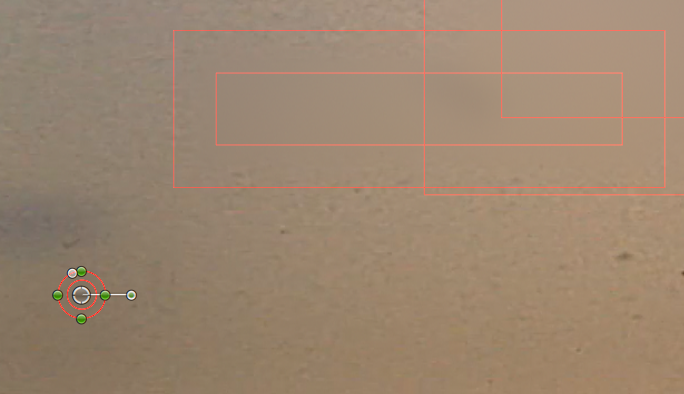
Before applying the blur amount, add the other most critical masks. Here's an overview of how the masks were applied for the above example:

User uploaded file

You can set a keyframe for the Amount parameter and when the masked/blurred area moves over "important" scene parts, you can keyframe the amount down to near zero and back up again when they reappear in the sky/background. Of all the methods I tried out, this one works the best - you'll have to deal with the spots but they won't be hanging out in the sky regions.


If you have problems with too many masks in one Gaussian blur instance, you can opt to use several copies on a single clip with different masking for each. There is at least one or two places in the clip you posted where a secondary Gaussian Blur would work better than trying to cram all the shape masks in with one instance of the effect.


If the end result is really important to you, then it will all be worth the effort. It will take some time. Otherwise, better color quality might serve you better (a little color board magic.)


BTW - what equipment are you using to telecine the old film to digital? This is quite good (considering it's 8mm.)

May 3, 2016 8:21 AM in response to fox_m

I can't seem to get the ring small enough. Those little sizing balls are in the way and I can't remove them. It doesn't give me an option to click done or feather or anything like that. Here is a pic for you to see what I mean. How do I make the circle small enough so I see what I am doing? You mentioned feather but I don't have that option apparently.

User uploaded file

Apr 30, 2016 6:39 PM in response to IVTC

You can probably pull it off with effects in FCPX. Here's a video that describes how to use the new masking features: https://www.youtube.com/watch?v=LKAFYnbr1ME then use Hue Saturation or Tint or Gaussian Blur or perhaps even the Color Board. Use the eye dropper to select the problem spot color and multiple shape masks to limit where the effect is applied. Shape masks can be keyframed (position, rotation) if necessary. Color masks can be keyframed for color over time. That video also introduces a set of effects that take advantage of the new masking setup that will allow you to mask out areas (similar to the Keyer, just easier to use), colorize masked areas with solids or gradients and a clone tool which will allow you to move adjacent "good" video into masked areas. You do not need those templates to handle your problem, so I'm not trying to make a sale here, but the information about masking in that video is quite useful.

May 2, 2016 8:25 AM in response to fox_m

Thank you so much for the info. I was watching the video and I am trying to do it but for some reason I am not able to do it right. If I try to mask it, I can't remove the dots and the video goes on so I don't want that mask to go over faces and stuff. Is there anyway you can give me step by step instructions if possible? Sorry for the hassle.


Here is a short clip:

http://expirebox.com/download/bb5b5c9208ac2b123af51b3c22df37fc.html

May 2, 2016 8:28 AM in response to IVTC

In the olden days, we would place a copy of the clip underneath. Apply a bit of blur to the lower copy. Move the lower copy over and up a few pixels, not many. Apply soft edged masks to the upper copy that open little holes to the bottom copy. You see the bottom copy through the holes.


SliceX has a fairly good reputation At $100 it's cheap compared to reshooting. But there are other pixel-level repair tools.If you're paying yourself, learning how to do invisible repairs using several different methods is going to be expensive.


Alos, find out where those artifacts are coming from and fix 'em. Dirt on your sensor, lens schmutz, dead pixels.

May 2, 2016 8:38 AM in response to IVTC

IVTC wrote:


Thank you so much for the info. I was watching the video and I am trying to do it but for some reason I am not able to do it right. If I try to mask it, I can't remove the dots and the video goes on so I don't want that mask to go over faces and stuff. Is there anyway you can give me step by step instructions if possible? Sorry for the hassle.


Here is a short clip:

http://expirebox.com/download/bb5b5c9208ac2b123af51b3c22df37fc.html


Your link merely points back to this same discussion... no clip

May 2, 2016 9:28 AM in response to IVTC

Thanks, I could see it now. It must be something on Safari on my side, as both the links redirected to this page.

I copied and pasted into Chrome and could download the movie.


It looks like dirt on the lens at the time of shooting.

With all the other scratches from old film that are in there, I would suggest you just leave it as is - true to the source, old, grainy film, with dirt and all.

But if you want to proceed, try and follow fox_m's advice.

May 2, 2016 10:01 AM in response to Luis Sequeira1

Yea kinda weird. Glad you got it to work tho.


Even tho its $100, I don't mind paying for it but I saw they had a bunch free tools to use so I downloaded all of them lol.I tried to mess with them but I can't get it to work properly. Either I am just ding-y or its just not user friendly to me. I spent all day trying to get it to work when fox_m suggested it. I have neat video installed so I applied that to help the noise since its a super 8 film but the dots are driving me insane.


Definitely! Part of the issue was that the lens was dirty but I just don't want to have to redo all 13 reels again.

May 3, 2016 10:43 AM in response to IVTC

Just click on the ring in the viewer and drag it smaller (it will allow you to create a "negative" feather by dragging inside the control point ring). You can click and drag on the "ring" portion of the control shape also. By using the red line part of the shape to resize, it will constrain the proportions of the entire mask as you resize. There is an "extra" dot control on the top of the shape and if you drag it out to the left, the circle shape changes to a rounded rectangle and finally to a rectangle when dragged all the way to the left.


The shape masks can be animated by keyframes as well. Once you set an initial keyframe, the size, shape and rotation of the mask will animate to follow your changes over time.


I was trying to recommend that you only use the blurring on "light" areas like sky and decrease the amount of blurring (or set it to zero) over darker areas (or scene objects. The spots are not as bad over darker areas. For the darker areas like those trees/shrubs, try using a Colorize filter (in the same way as you're using the Gaussian Blur) and set the Remap Black to a nearby shade. Remap white to white (it's default is a beige) or another shade of a neighboring area. Colors can be keyframe animated in FCPX so that as the scene changes/lighting changes, you can use the same effect and change the remapped colors as time goes on.


What you're attempting to do here is ultimately more time consuming than reshooting all the video. There are film cleaners that you can use to remove a lot of the hairs and dust (care must be taken not to let the film touch sections that are still wet - so - another time consuming task.)


Are you shooting directly into the projector lens? or refracting the image to a screen (it looks absolutely flat, so I don't get the impression you're shooting off a wall or straight projection off a screen.) I'm asking because I had a "Moviestuff" telecine projector, but an accident with a mis-feed took out the film gate. I'm looking for another more economical method of transferring my old 8mm films and you're getting very good results!

May 3, 2016 2:54 PM in response to fox_m

Ill try again tomorrow because its driving me bonkers today. I am going directly into the camera lens. Yea I wanted to buy Moviestuff equipment. Its good quality. Maybe you can buy the part and replace it from him?


Here is another shot of a different reel but there are so many specs. It would take me forever to do that to the whole screen or and by then it would just be a gaussian screen. http://expirebox.com/download/16abe2eb9daa3e26c6c8685e1df62c0f.html


Make sure to copy and paste the link into the bar or else it won't open for some reason unless they fixed the problem.

May 3, 2016 5:24 PM in response to IVTC

IVTC wrote:


Ill try again tomorrow because its driving me bonkers today. I am going directly into the camera lens. Yea I wanted to buy Moviestuff equipment. Its good quality. Maybe you can buy the part and replace it from him?


They changed all their hardware to a different type of scanning method -- the reused old projectors are "out". There are no replacement parts available (from them.) I reached out to them for "just the instructions on how to repair the gate" and have not heard back from them. I suppose I could hunt down another projector of the same make and model and scavenge it (probably rather cheaply compared to the cost of the "Workprinter".) Oh well...

Here is another shot of a different reel but there are so many specs. It would take me forever to do that to the whole screen or and by then it would just be a gaussian screen. http://expirebox.com/download/16abe2eb9daa3e26c6c8685e1df62c0f.html


... definitely... wow.


When creating links in this editor, always type a word like "here", select it, click on the A icon in the toolbar above and paste the link in the textbox. This online editor is quite touchy about links. I believe, once upon a time, you could simply type or paste a link in the text body and the editor correctly adapted it to a valid link... but it's been awhile now (at least since they revamped the whole UI the last time.)

This thread has been closed by the system or the community team. You may vote for any posts you find helpful, or search the Community for additional answers.

How can I remove a little dot that recorded on my videos in the same exact spot?

Welcome to Apple Support Community
A forum where Apple customers help each other with their products. Get started with your Apple Account.