Apple Intelligence now features Image Playground, Genmoji, Writing Tools enhancements, seamless support for ChatGPT, and visual intelligence.

Apple Intelligence has also begun language expansion with localized English support for Australia, Canada, Ireland, New Zealand, South Africa, and the U.K. Learn more >

You can make a difference in the Apple Support Community!

When you sign up with your Apple Account, you can provide valuable feedback to other community members by upvoting helpful replies and User Tips.

Looks like no one’s replied in a while. To start the conversation again, simply ask a new question.

In Preview v. 10.1 how do you get rid of the extra dark grey space around a picture?

In Preview v. 10.1 how do you get rid of the extra dark grey space around a picture? FYI -- re-sizing the box doesn't work. This is as tight as I can get it. Thanks!


MacBook

Posted on Jul 18, 2019 7:52 AM

Reply
Question marked as Top-ranking reply

Posted on Jul 19, 2019 3:06 AM

That is the default Dark mode background, though you can set it to any non-transparent color via Preview's Preferences : General. There is no removing this background from Preview, and the application will not allow you to collapse the window below 555 x 256 in size. Depending on the size of the image, zooming may reduce the visible background above and below the image, but not left and right. If the image is large enough at 100%, it will eliminate all visible background. Here is a 650 x 300 pixel jpeg that looks like this when initially opened in Preview on macOS Mojave 10.14.5:
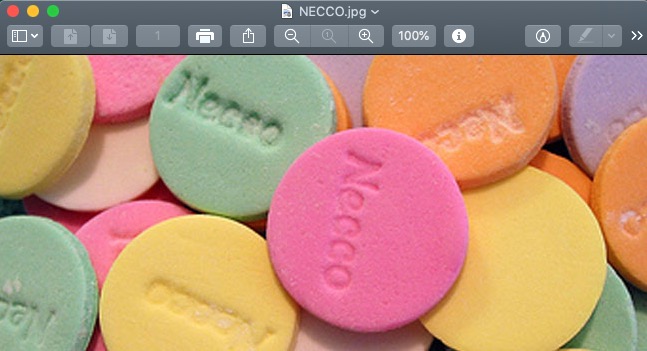


I have added the optional Scale toolbar item from Preview's View -> Customize Toolbar… panel, which keeps me aware of the zoom factor.

10 replies
Question marked as Top-ranking reply

Jul 19, 2019 3:06 AM in response to prahas777

That is the default Dark mode background, though you can set it to any non-transparent color via Preview's Preferences : General. There is no removing this background from Preview, and the application will not allow you to collapse the window below 555 x 256 in size. Depending on the size of the image, zooming may reduce the visible background above and below the image, but not left and right. If the image is large enough at 100%, it will eliminate all visible background. Here is a 650 x 300 pixel jpeg that looks like this when initially opened in Preview on macOS Mojave 10.14.5:


I have added the optional Scale toolbar item from Preview's View -> Customize Toolbar… panel, which keeps me aware of the zoom factor.

Jul 18, 2019 7:58 AM in response to prahas777

Sorry but it is not clear to me what it is you want to do. Are you trying to increase the size of the picture? If so you can't for example take a 300pixel wide image and increase it to 1000pixels wide. A pixel is a pixel and you can't just add pixels to an image. Or is the image really a 1000pixel image that is not displaying at 1000pixels width for example?


So what is it you are trying to do, increase the size of the image?


Maybe I'm just not understanding sorry.

Jul 18, 2019 11:00 AM in response to BobTheFisherman

Thanks for taking an interest. The size of the image is fine. I'm trying to resize the box *around* the image, so that the edges of the box are very close to the edges of the picture. For eg, in Pages, if I turn off the format sidebar and the thumbnails sidebar, a similar grey space exists on each side of my image (in this case, the 8 by 11 page). But I can grab the bottom right corner of the window, and resize it so that the window is very close to the same size as the page. In Preview (as seen in the above image), this is the tightest I can resize the window. It matters because I like to have other apps and things on my screen, and the large grey areas take up screen space. Make sense? TY.

Jul 18, 2019 6:13 PM in response to Kurt Lang

Thanks Kurt for having a look. You are talking about cropping an image. The grey in my example above is not part of the image. I tried taking all of the items out of the toolbar (thinking that Preview wouldn't let me size the window smaller than the horizontal length of the tool bar) but that didn't help. I am defeated. I think Preview insists on leaving large amounts of space on both sides of the image, no matter what. :-(

Jul 18, 2019 8:00 PM in response to BobTheFisherman

Bob -- thanks -- so I gotta question: if you open that screen grab in Preview, make it smaller with zoom minus, and then re-size the window it is in, can you get rid of the border around it? Here in the discussion thread it looks great, but its in Preview where I have trouble. :-) I may just have to stop using preview, and use Pages instead. Thanks!

Jul 19, 2019 4:31 AM in response to prahas777

Okay. That wasn't clear in your post. You only said you wanted to get rid of the gray space. I had to assume it was part of the image since you can only "get rid of" part of an image by cropping.


No, you cannot remove the background. There's nothing to remove as it's simply part of Preview's display window, and Preview will not collapse any further in the width than the space needed to show all of the items on the tool bar, and only 250 pixels in height for the image window.

In Preview v. 10.1 how do you get rid of the extra dark grey space around a picture?

Welcome to Apple Support Community
A forum where Apple customers help each other with their products. Get started with your Apple Account.