You would simply set up the Time Capsule again, just like you did the first time when the Time Capsule was new.
Perform a Hard Reset on the Time Capsule
Connect an Ethernet cable from one of the LAN <--> Ethernet ports on your modem/router (there are probably 4 of them, choose any one that you wish) to the WAN "O" port on the Time Capsule
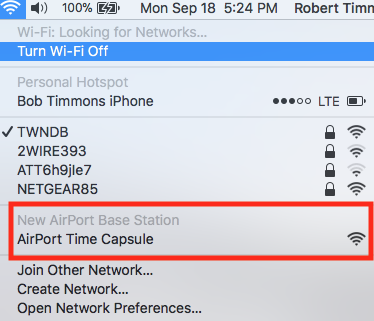
Click on the WiFi menu at the top of your Mac's screen and look for a setting of New AirPort Time Capsule or New AirPort Base Station
Click on the name of the device just below that listing

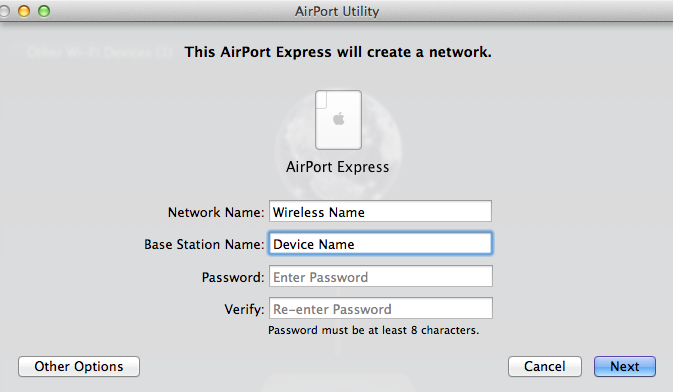
When you click on AirPort Time Capsule, that will start up the AirPort Utility set up "wizard". The utility will take a few seconds to analyze the network and then display a screen that looks similar to the example below except that you will see a Time Capsule pictured on your screen.

Network Name......Type in something simple for the temporary network
Base Station Name......Do the same for the temporary device name
Password.......Type in any 8 character password that you want
Verify......Do the same to confirm
Click Next
The wizard will set up everything for you.
Now you can use AirPort Utility to access the settings on the Time Capsule so that you can erase the Time Capsule hard drive. The instructions for that are already posted above
When the erase is done, perform a Hard Reset on the Time Capsule again to erase the temporary network settings that you used to erase the disk.