It's in the manual under 'Autopunch'. Make sure you have all your advanced options ticked in Logic Preferences.
Record in Autopunch mode
1. Turn on Autopunch mode by doing one of the following:
◦ Click the Autopunch button  in the control bar.
Note: You can add the Autopunch button by customizing the control bar. For information, see Customize the control bar.
in the control bar.
Note: You can add the Autopunch button by customizing the control bar. For information, see Customize the control bar.
◦ Option-Command-click anywhere in the ruler.
2. The autopunch area is indicated by a red stripe in the middle third of the ruler, with the left and right autopunch locators serving as punch-in and punch-out points.

3. Set the autopunch area by doing one of the following:
◦ Drag the Punch In and Punch Out locators in the ruler.
◦ Drag vertically in the autopunch locator fields in the control bar.
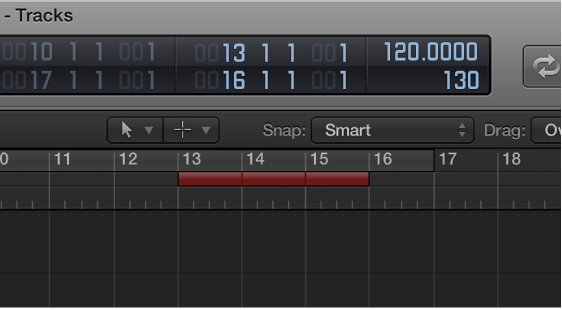
◦ Drag the cycle area into the autopunch area to quickly match the autopunch area to the cycle range.
4. Place the playhead at any position before the punch-in point.
5. Click the Record button in the control bar (or press R) to start recording.
6. Click the Stop button in the control bar (or press the Space bar) to stop recording.
A region that matches the length of the autopunch area is created. Any audio input received before the punch-in or after the punch-out point streams through Logic Pro as usual, but is not recorded.
If you want to improve a difficult part of a certain passage, you can use a combination of the Cycle and Autopunch functions. Cycle mode recording allows you to practice as many times as you like before performing the final take. On each cycle pass, only events or audio that falls within the area defined by the autopunch locators is recorded. This lets you make use of the preceding song section to “get into the groove.”