It requires a timecode embedded in the movie.
...
For example, here are the Big Sur 11.5.2 QuickTime Player's View > Time Display options for such .dv file (an old archived iMovie 4-6 .dv file from a Sony TRV320E):
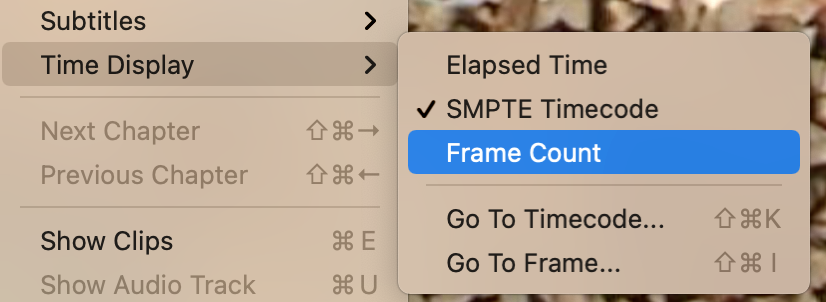
...and the SMPTE Timecode display at the start of the .dv file (the very first .dv clip of that archived .dv happened to start with timecode 00:25:06:17):

...and the Frame count display at the 32th frame of the 1500 frame movie (1 minute at 25fps = 25 x 60 = 1500 frames).

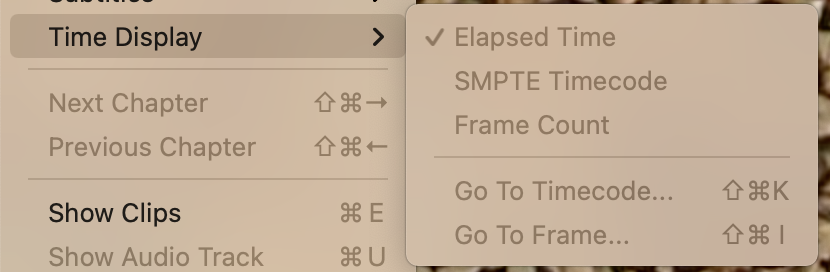
Or, for example, that same .dv file encoded with ffmpeg option -timecode 00:00:00:00 (so that timecode is forced to start at 00:00:00:00 instead what it happens to be in the .dv file). This command also "bob deinterlaces" PAL 25fps to double framerate 50fps by preserving all fields:
for i in *.dv; do ffmpeg -i "$i" -vf bwdif=1,scale=788:576,crop=768:576:10:0,setsar=sar=1/1 -c:v libx265 -crf 18 -preset slow -timecode 00:00:00:00 -tag:v hvc1 -c:a aac -b:a 128k "${i%.*}_converted.mp4"; done

...and the Frame count display at the 32th frame of the 3000 frame movie (1 minute at 50fps = 50 x 60 = 3000 frames):

Or to force timecode off in ffmpeg:
for i in *.dv; do ffmpeg -i "$i" -vf bwdif=1,scale=788:576,crop=768:576:10:0,setsar=sar=1/1 -c:v libx265 -crf 18 -preset slow -write_tmcd off -tag:v hvc1 -c:a aac -b:a 128k "${i%.*}_converted.mp4"; done
...QuickTime Player's View > Time Display options are grayed out for such ffmpeg encoded timecode-less movie:
I don't know if it is possible to losslessly add a timecode to an existing movie without re-encoding it (i.e. just rewrapping it to a container). I always add timecode to newly encoded movies because it is handy sometimes.