how do I add a signature to my emails?
how do I add a signature to my emails? I have signatures in the queue but I can't get them transferred to my emails
MacBook Air 13″, macOS 12.0
how do I add a signature to my emails? I have signatures in the queue but I can't get them transferred to my emails
MacBook Air 13″, macOS 12.0
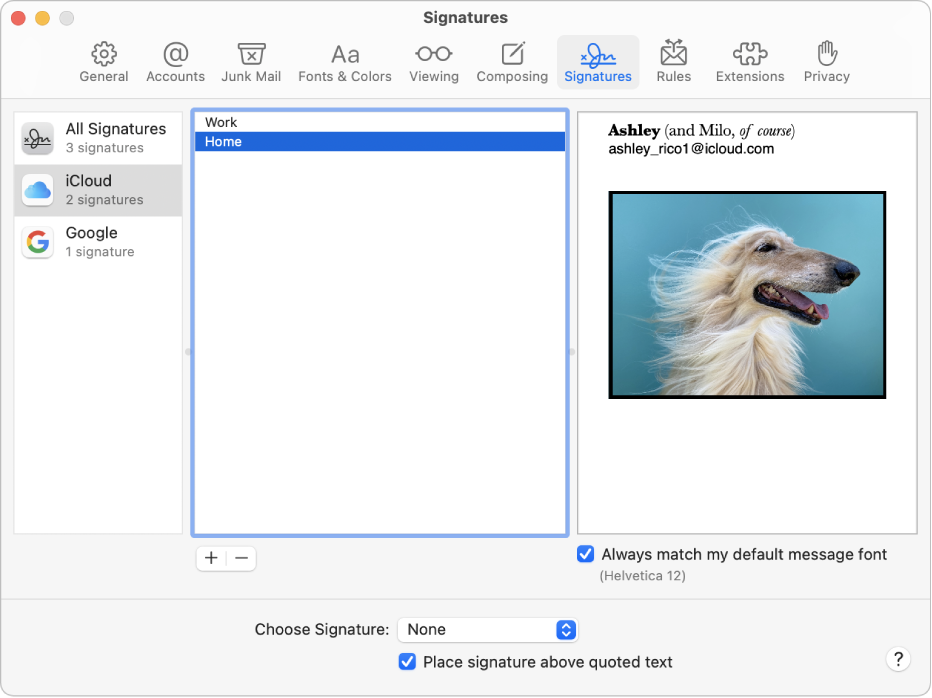
Create and use email signatures in Mail on Mac
You can create prepared text, called a signature, to include when you send email messages. For example, you can create one signature for your work email and another signature for your personal email.

Create signatures
If you want your signature to appear after the original text of messages you reply to or forward, deselect the “Place signature above quoted text” checkbox.
Delete signatures
When you delete a signature from All Signatures, it’s deleted from any account that uses it.
Automatically add a signature to emails
You can choose a signature to automatically add to messages you send.
If you want to stop having a signature automatically added to your messages, click the Choose Signature pop-up menu, then choose None.
Add a signature to emails yourself
Remove a signature from emails
Depending on how a recipient’s mail server handles signatures, your signature may appear as an attachment or image to the recipient.
If you use iCloud Drive on your Mac and other devices, and have Mail selected in iCloud Drive options, your signatures are automatically updated and available on those devices. See Use iCloud Drive to store documents.
If you need to send a signed PDF document, you can use Markup in Mail to create a handwritten signature and add it to the document. You can also use the Preview app to fill out and sign PDF forms.
Create and use email signatures in Mail on Mac
You can create prepared text, called a signature, to include when you send email messages. For example, you can create one signature for your work email and another signature for your personal email.

Create signatures
If you want your signature to appear after the original text of messages you reply to or forward, deselect the “Place signature above quoted text” checkbox.
Delete signatures
When you delete a signature from All Signatures, it’s deleted from any account that uses it.
Automatically add a signature to emails
You can choose a signature to automatically add to messages you send.
If you want to stop having a signature automatically added to your messages, click the Choose Signature pop-up menu, then choose None.
Add a signature to emails yourself
Remove a signature from emails
Depending on how a recipient’s mail server handles signatures, your signature may appear as an attachment or image to the recipient.
If you use iCloud Drive on your Mac and other devices, and have Mail selected in iCloud Drive options, your signatures are automatically updated and available on those devices. See Use iCloud Drive to store documents.
If you need to send a signed PDF document, you can use Markup in Mail to create a handwritten signature and add it to the document. You can also use the Preview app to fill out and sign PDF forms.
Although it is as simple at the Apple recommended reply it doesn't always work. :(
I've come looking for an answer for a problem with signatures and haven't had any luck finding help yet. Maybe someone here can help!
I have a colleague who has followed all the instructions to create a signature and checking in Mail > Preferences > Signatures it all looks good (and no different to how I've set up my own signatures). But when he writes an email and clicks on the signature drop down list the only things in it are "None" and "Edit Signatures". Mail has been closed and reopened (that can solve some problems), and the problem has persisted across a migration to a different macbook (probably not surprisingly).
The new macbook (air M1) is running Big Sur. I'm not sure of the version running on the old macbook.
Any ideas?
how do I add a signature to my emails?