You can make a difference in the Apple Support Community!

When you sign up with your Apple Account, you can provide valuable feedback to other community members by upvoting helpful replies and User Tips.

💡 Did you know?

⏺ If you can't accept iCloud Terms and Conditions... Learn more >

⏺ If you don't see your iCloud notes in the Notes app... Learn more >

Looks like no one’s replied in a while. To start the conversation again, simply ask a new question.

Transferred all data from XS to iPhone 14, but network (sim number) not transferring. Help please

I’ve set up my new iPhone 14 but my phone number and network provider won’t transfer. What can I do please ?

Posted on Sep 25, 2022 8:02 AM

Reply
Question marked as Top-ranking reply

Posted on Sep 25, 2022 8:05 AM

Use eSIM Quick Transfer on iPhone

Some carriers support SIM transfers from your previous iPhone to your new iPhone without needing to contact them. You can also convert your current physical SIM card to an eSIM. 

If you don't have access to your current iPhone, contact your carrier to transfer your eSIM.

While you're setting up your iPhone, if you're asked to transfer your SIM, follow the onscreen instructions to transfer your physical SIM or eSIM. If you need to transfer more than one SIM to your new iPhone, transfer your additional SIMs following the steps below.
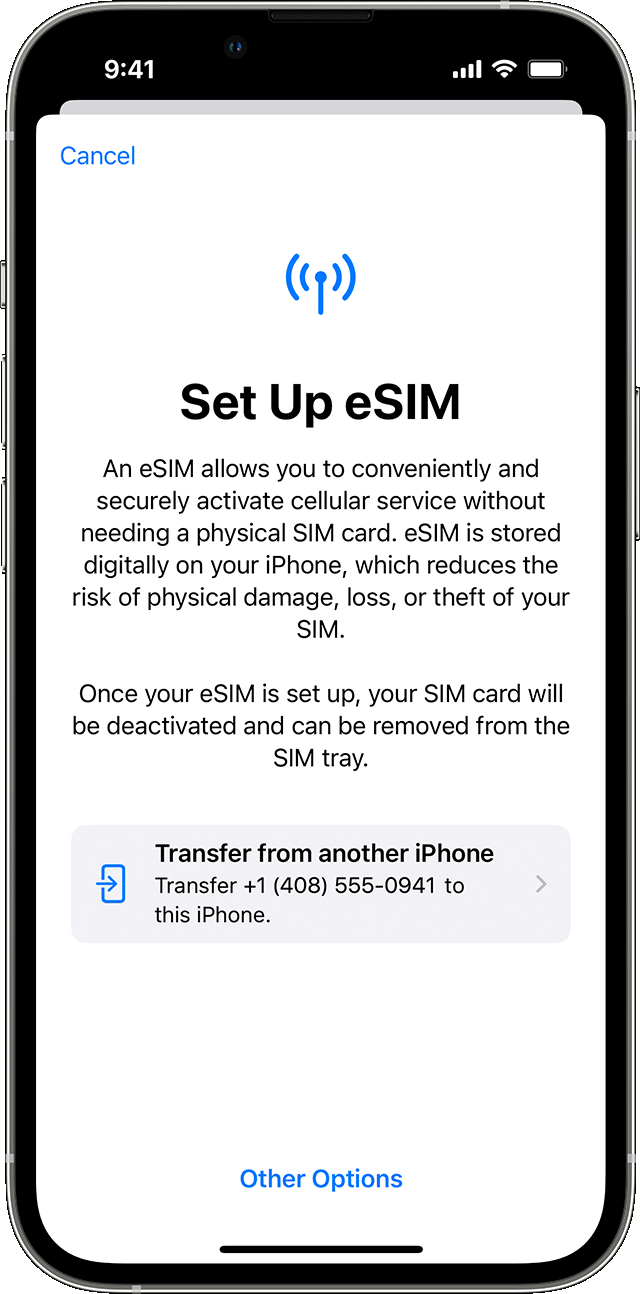
 

Transfer a physical SIM or eSIM on your previous iPhone to an eSIM on your new iPhone after setup

  1. On your new iPhone, go to Settings > Cellular > Add Cellular Plan. 
  2. Choose a cellular plan to transfer from another device. If you don't see a list of numbers, tap Transfer From Another Device. This requires both devices to have iOS 16 or later.
  3. Check for instructions on your previous iPhone to confirm the transfer. To confirm, tap Transfer or, if asked for a verification code, enter the code that's displayed on your new iPhone.
  4. Wait for the cellular plan to activate on your new iPhone. Your previous SIM is deactivated when the cellular plan on your new iPhone activates.
  5. If a banner appears on your new iPhone that says Finish Setting Up Your Carrier's Cellular Plan, tap it. You will be redirected to your carrier's webpage to transfer your eSIM. If you need help, contact your carrier.


1 reply
Question marked as Top-ranking reply

Sep 25, 2022 8:05 AM in response to Floannwenna

Use eSIM Quick Transfer on iPhone

Some carriers support SIM transfers from your previous iPhone to your new iPhone without needing to contact them. You can also convert your current physical SIM card to an eSIM. 

If you don't have access to your current iPhone, contact your carrier to transfer your eSIM.

While you're setting up your iPhone, if you're asked to transfer your SIM, follow the onscreen instructions to transfer your physical SIM or eSIM. If you need to transfer more than one SIM to your new iPhone, transfer your additional SIMs following the steps below.


Transfer a physical SIM or eSIM on your previous iPhone to an eSIM on your new iPhone after setup

  1. On your new iPhone, go to Settings > Cellular > Add Cellular Plan. 
  2. Choose a cellular plan to transfer from another device. If you don't see a list of numbers, tap Transfer From Another Device. This requires both devices to have iOS 16 or later.
  3. Check for instructions on your previous iPhone to confirm the transfer. To confirm, tap Transfer or, if asked for a verification code, enter the code that's displayed on your new iPhone.
  4. Wait for the cellular plan to activate on your new iPhone. Your previous SIM is deactivated when the cellular plan on your new iPhone activates.
  5. If a banner appears on your new iPhone that says Finish Setting Up Your Carrier's Cellular Plan, tap it. You will be redirected to your carrier's webpage to transfer your eSIM. If you need help, contact your carrier.


Transferred all data from XS to iPhone 14, but network (sim number) not transferring. Help please

Welcome to Apple Support Community
A forum where Apple customers help each other with their products. Get started with your Apple Account.