Hi Taxiguru584,
Thanks for posting in Apple Support Communities! You might see different options in the Print dialog depending on your printer and the app you’re using for it. Find the steps to adjust printer settings below from the article Print documents from your Mac:
- "With a document open on your Mac, choose File > Print, or press Command-P.
The Print dialog opens, with a preview of your printed document.
Note: You might see different options in the Print dialog depending on your printer and the app you’re using. If the following steps differ from what you’re seeing, check the documentation for the app you’re using by clicking Help in the menu bar.
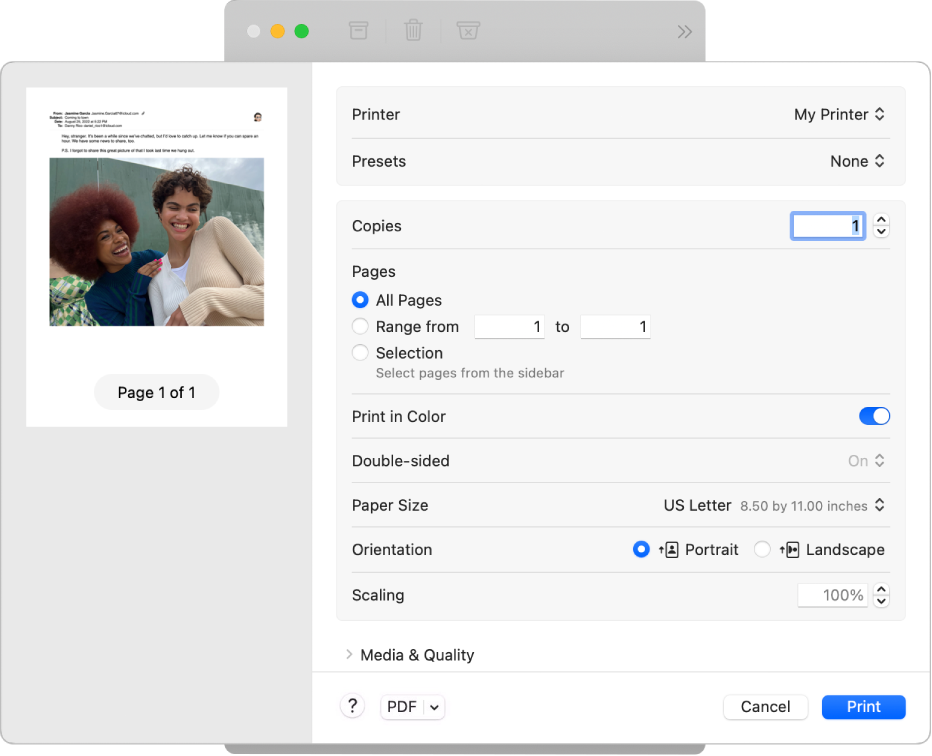
Tip: To view a full-size preview in the Preview app, click the PDF pop-up menu, then choose Open PDF in Preview.
2. If the settings in the Print dialog are fine as is, click Print, and you’re done. Otherwise, continue to step 3.
3. To adjust the printing options, choose any of the following common print settings:
- Printer: Choose the printer you want to use. If the printer isn’t available, you can add one. See Add a printer to your printer list.
- Presets: Choose a preset for the printer to use with your document, A preset is a group of print settings. In most cases you can use the default settings, but you can also choose a group of settings you’ve saved from a previous print job. See Save frequently used print settings.
- Copies: Specify the number of copies you want. To print all pages of a document before the next copy prints, click Paper Handling, then select “Collate Sheets.” See Print pages in normal order.
- Print Range: Specify the pages you want to print. You can print all pages or select a range of pages. For example, you can print page 6 through 9 of a 10-page document. You can also print a selection of pages in the range using the Selection button. Click the page label in the Preview sidebar to select the page for printing. Pages in your selection don’t have to be in a continuous range. For example, you can select to print page 2 and page 4 in a 5-page document.
- Print in Color: Select to print in color, if your printer has this capability. Turning the option off prints documents in black and white.
- Double-Sided: Choose On from the Double-Sided pop-up menu to print on both sides of the paper (also called duplexing or two-sided printing), if your printer has this capability. You can also choose On (Short Edge) to set the document to print ready for binding at the top of the page.
- Paper Size: Choose a paper size for your document. For example, choose US Letter when the printer is loaded with 8.5-by-11-inch paper.
- Orientation: Click the buttons to switch between portrait or landscape orientation. The change in your document appears in the preview pages in the sidebar.
- Scaling: Enter a percentage of scaling to adjust the printed image to the paper size. The change appears in the preview pages in the sidebar.
4. Click Print."
These steps will allow you to customize the option to print in color. If you're not seeing that option, contact the manufacturer to check for any necessary drivers or software that is needed for the option to appear.
Cheers!
