You can make a difference in the Apple Support Community!

When you sign up with your Apple Account, you can provide valuable feedback to other community members by upvoting helpful replies and User Tips.

Looks like no one’s replied in a while. To start the conversation again, simply ask a new question.

How to create the Write On effect on a solid circle outline so that it becomes dashed 3/4 way through, and capped with an arrow?

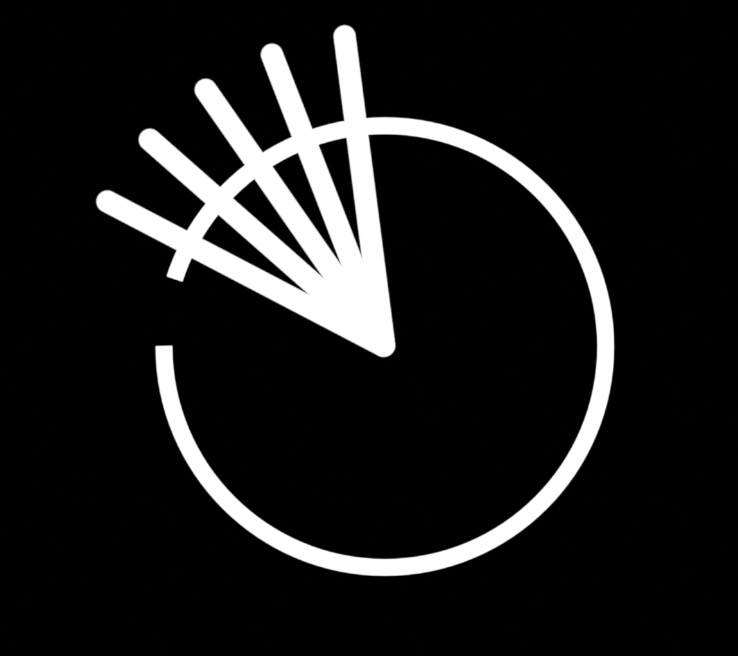
This is the desired effect. You can see how the circle outline starts with a solid line, then it becomes dashed, and then ends with an arrow cap.


I managed to create this via some kind of hack/workaround, but I was wondering if there's a proper way to achieve this in Motion 5?


Many thanks!

Posted on Aug 15, 2023 9:54 AM

Reply
Question marked as Top-ranking reply

Posted on Aug 15, 2023 3:07 PM

Cleaner and nicer.... nah... There's no one right way to do this type of effect. This method only saves you from having to go to another app first.


Create a circle, center it. No Fill. Outline Width ~ 28. Radius: 344 (for this example). The animation will include the Last Point Offset from 0% to 98%. Since the animation is **clockwise**, you will need to select the parent Group and set the Rotation > X to -180 (or 180) to flip the circle upside down.


Draw a Line. Length about 500. Center it. Adjust the Anchor point so that it's on the line's end - with the circle, it should look like a long clock hand.


Replicate the Line. Replicator Shape = Line. Start Point and End Point at 0,0. Points = 5.

Set the Angle to -7.3 and the Angle End to about -55.


This is what it should look like:
[ Ramp behavior already applied for this image - read more below.]


Select the Replicator and set the Blend Mode to Silhouette Alpha. That should produce the "notches".


Go into the Library > Shapes and apply the Arrow shape. Scale it down to 40% (should be a close fit).

Set the Anchor Point > X of the Arrow to the about -851 (for this example).


Add a Ramp Behavior to Arrow > Rotation > Z. Set the Start Value to ~2º and the End Value to ~342º. Use the Start Offset and End Offset to set the speed and timing of the animation. I used Start Offset = 0 and End Offset = 540 which is based on a 60fps project of length 10 seconds. That's 600 frames total. Your project length will affect your choice of End Offset and its value needs to be #of frames from the end of the project. This example used 1 second of animation time (60frames).


To the Circle > Style > Last Point Offset, add a Link Behavior. To the Source Object, drag and drop in the Arrow object. Set the Source Parameter to Properties > Transform > Rotation > Z (already animated by the Ramp).

Set the Z offset (all the way at the bottom of the Link) to 180. [Notice that the degrees of angle directly translate to % of progress of the Last Point Offset without having to make any further adjustments to the Link behavior — in this case — one revolution = 100%!]


Shorten the Stem on the arrow like this so it fits more nicely and looks like it belongs to the circle outline:
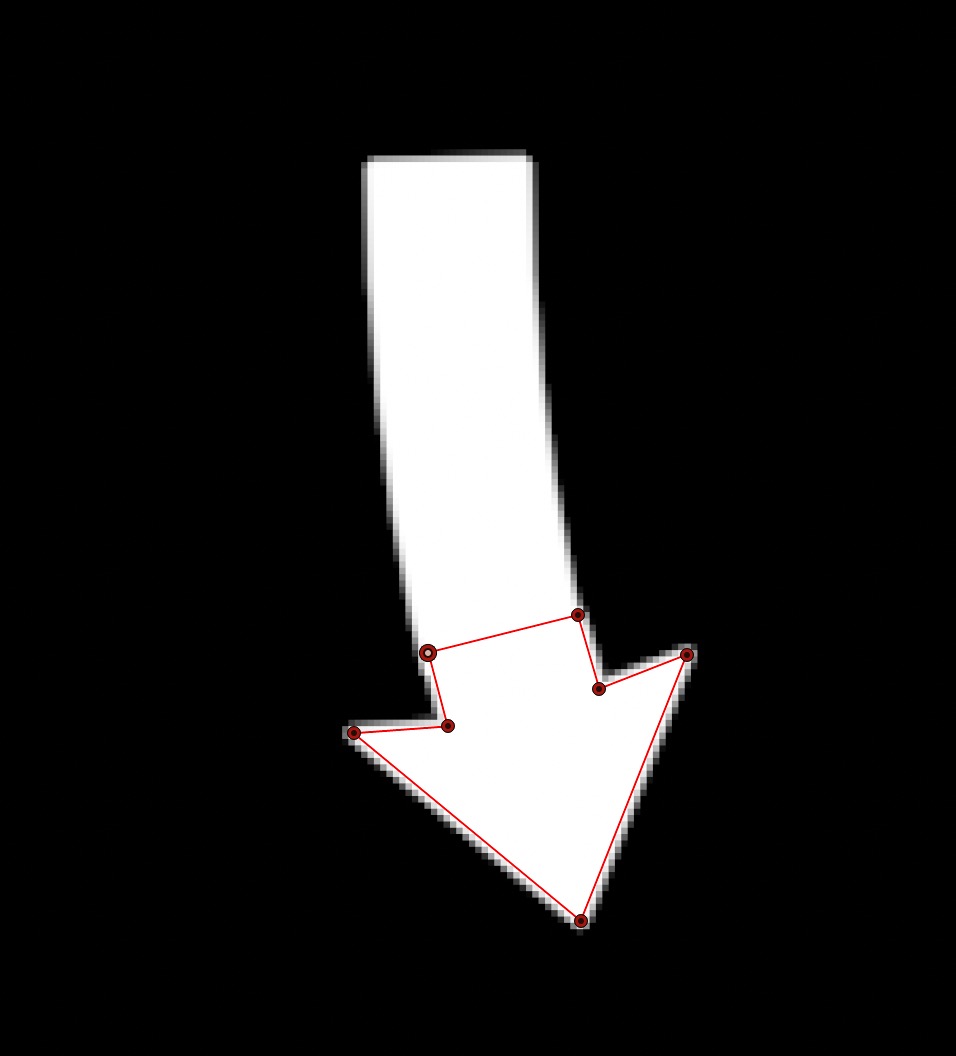


You should get something like:


So — not as clean — not as nice — just a different approach that doesn't involve going outside of Motion. Whatever gets the job done is a good job!


6 replies
Question marked as Top-ranking reply

Aug 15, 2023 3:07 PM in response to Luis Sequeira1

Cleaner and nicer.... nah... There's no one right way to do this type of effect. This method only saves you from having to go to another app first.


Create a circle, center it. No Fill. Outline Width ~ 28. Radius: 344 (for this example). The animation will include the Last Point Offset from 0% to 98%. Since the animation is **clockwise**, you will need to select the parent Group and set the Rotation > X to -180 (or 180) to flip the circle upside down.


Draw a Line. Length about 500. Center it. Adjust the Anchor point so that it's on the line's end - with the circle, it should look like a long clock hand.


Replicate the Line. Replicator Shape = Line. Start Point and End Point at 0,0. Points = 5.

Set the Angle to -7.3 and the Angle End to about -55.


This is what it should look like:

[ Ramp behavior already applied for this image - read more below.]


Select the Replicator and set the Blend Mode to Silhouette Alpha. That should produce the "notches".


Go into the Library > Shapes and apply the Arrow shape. Scale it down to 40% (should be a close fit).

Set the Anchor Point > X of the Arrow to the about -851 (for this example).


Add a Ramp Behavior to Arrow > Rotation > Z. Set the Start Value to ~2º and the End Value to ~342º. Use the Start Offset and End Offset to set the speed and timing of the animation. I used Start Offset = 0 and End Offset = 540 which is based on a 60fps project of length 10 seconds. That's 600 frames total. Your project length will affect your choice of End Offset and its value needs to be #of frames from the end of the project. This example used 1 second of animation time (60frames).


To the Circle > Style > Last Point Offset, add a Link Behavior. To the Source Object, drag and drop in the Arrow object. Set the Source Parameter to Properties > Transform > Rotation > Z (already animated by the Ramp).

Set the Z offset (all the way at the bottom of the Link) to 180. [Notice that the degrees of angle directly translate to % of progress of the Last Point Offset without having to make any further adjustments to the Link behavior — in this case — one revolution = 100%!]


Shorten the Stem on the arrow like this so it fits more nicely and looks like it belongs to the circle outline:


You should get something like:


So — not as clean — not as nice — just a different approach that doesn't involve going outside of Motion. Whatever gets the job done is a good job!


Aug 18, 2023 2:13 PM in response to fox_m

I want to be clear that I do find your workflow pretty straightforward, fox_m! It's just that as a beginner-intermediate user to Motion, I feel like as soon as linking is involved, it gets harder for me to navigate the project because I have to always remember which is the parent parameter and which one is the child parameter. It makes making changes to linked layers a bit more "risky," I guess.


The way I hacked it was:

  1. First I created a circle. Then I converted the circle to control points, added a control point at around 10 o'clock, and opened up the circle. Now I have a circle, with a quarter of it missing (this will be the dashed line).
  2. Second, I used the bezier tool to create the curve for that missing quarter. This allowed me to put an arrow on the end cap.
  3. Third, I used several line objects to create the notches (just like you said).
  4. Finally, I used the write on behavior for the solid line circle and the curved line with the arrow. I just had to sync up their timing the curved line looks like it's a continuation of the original circle.


There were several flaws to the way I did it (arrow goes under the mask, the arrow only appears in the last quarter, and the notches aren't uniform), but they aren't really noticeable.


Your method pretty much avoided all those flaws.


And you are right. Your method really inspired me to explore Motion more. I came from AE and Motion is so much more user-friendly, not to mention its much faster playback and its more powerful plugin creation capability for FCPX (compared to creating MOGRT for Premiere, based on my limited experience).


Aug 15, 2023 12:33 PM in response to jameszhan9592

Here is how I'd probably do it:


1) Prepare the image of the circle in a program such as Pixelmator and import into Motion - let call this A


2) Make a normal circle C and adjust its line width so that it is just wide enough to cover A (bearing in mind that the arrow part is thicker than the rest of the circle)


3) Apply the Write On behavior to C


4) Add an Image Mask to A and choose C as the source


If there is a cleaner nicer way, I am sure that Fox M will tell us soon!


Aug 16, 2023 11:41 PM in response to jameszhan9592

Convoluted? Well... maybe you're right.


The Replicator could have been replaced with 5 separate Line objects.


The notch pattern could be created with an Opacity over Stroke parameter - but that requires that the Circle outline be Brush Type > Airbrush or Image to gain access to the Stroke panel for the Shape. Unfortunately, when you use Airbrush or Image, you cannot set the Start and End Caps of the First and Last Point Offsets to Arrow (and you're stuck adding the extra arrow shape anyway!)


If you add an arrow like I did, it Must pass Over the "device" you use to create the notches, otherwise... it just looks weird. So that established the layer ordering of objects (circle bottom, replicator middle and arrow on top).


The replicator makes multiplying the lines ... fairly easy (there's still the matter of the approach I used to create the Anchor point center to fan them out.)


There's also the aggravation that All shapes are outlined in the Clockwise direction - easy to flip - but it's one of those things you need to be familiar with. You could animate the First Point Offset parameter from 100 to 0... but then you'd also have to make the Arrow's animation go backwards. It's still easy to do — harder to explain...


Motion is very much like Photoshop except in 3D space (and the lack of "paint tools"). Layering and blending is the way to accomplish a great deal of the visual "shortcuts" going from basic things like a simple circle to an animation of an arrow and it's "trail".


When you created your animation, how did you accomplish it? ...what was your hack? On some level, it was probably somewhat similarly even if you manually drew the circle, notched it by erasing some kind of way and attaching an arrow head to the lead part of the animation... **frame by frame**! All I did is use what I could find in Motion that automated those steps.


Hope you're inspired to explore! There's is a lot of stuff in Motion that is just "wickedly cool". ;)


How to create the Write On effect on a solid circle outline so that it becomes dashed 3/4 way through, and capped with an arrow?

Welcome to Apple Support Community
A forum where Apple customers help each other with their products. Get started with your Apple Account.