Yes, you can absolutely create a password-protected zip archive using the Terminal option on your Mac or professional Compression tool. They can all add an extra layer of security to your files.
Method 1. Using "FossZIP"
FossZIP is a popular file compression and extraction utility for macOS. It's essentially a file archiver and manager, similar to WinZip or WinRAR on Windows, but designed specifically for Mac users.
- Install "FossZIP" from its official website.
- Select your files, right-click, and choose "Compress [X] Items."
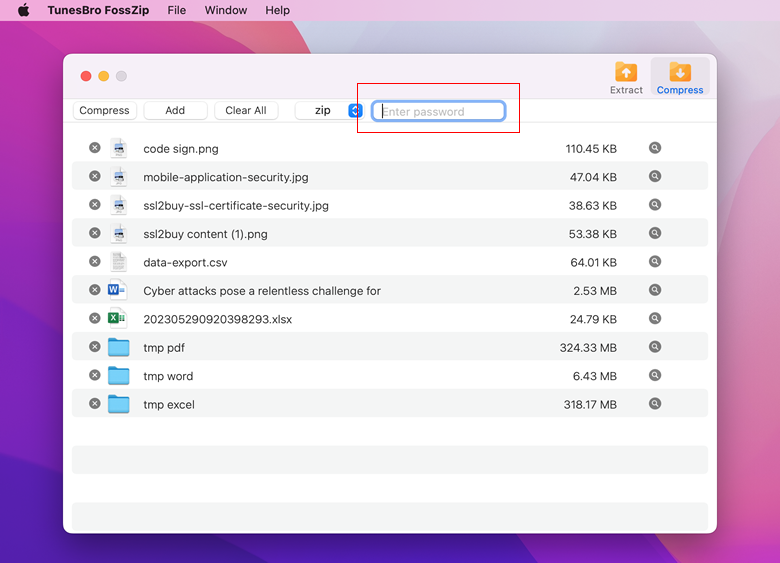
- Open "FossZIP."
- Drag and drop the zip file into "FossZIP."
- In "FossZIP," set a password and choose encryption options.
- Click "Create" to generate the password-protected zip archive.
These third-party tools offer user-friendly interfaces for creating password-protected zip archives on your Mac.
Source: https://www.sysgeeker.com/blog/how-to-create-password-protected-zip-file-on-mac.html
Method 2. Zip a file on Mac using Terminal
Creating a zip file on macOS using the Terminal is straightforward. You can use the zip command to create a zip archive. Here's how to do it:
- Open Terminal: You can find the Terminal app in the Utilities folder within the Applications folder, or you can use Spotlight (Command + Space, then type "Terminal").
2. Navigate to the Folder: Use the cd command to navigate to the folder containing the files you want to zip.
3. Create the Zip File: To create a zip file, use the zip command followed by the name you want to give to the zip archive and the files you want to include.
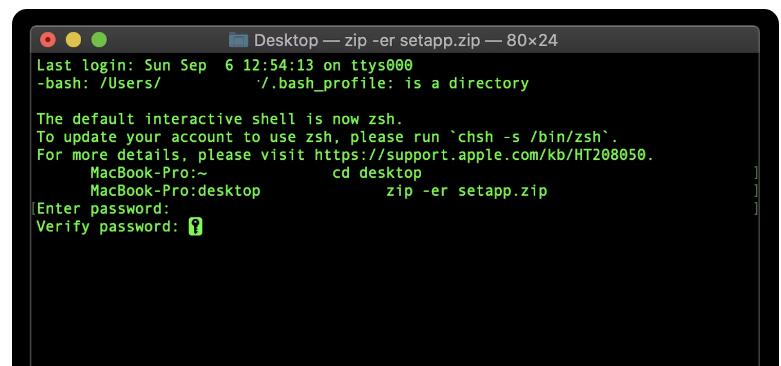
For example, to zip a file named "example.txt," you can use the following command:
zip -er filename.zip
While using Terminal to create a zip file is a valid method, I understand that it may not be suitable for everyone, especially those who are not comfortable with command-line interfaces. So, the method 1 maybe a best solution.