Open any image into Photoshop you're going to use. It doesn't matter which one.
I'm going from Photoshop CC 2014, so some of this may be slightly different on your end if you're not using the same release version.
1) Click on the Actions palette tab. If you don't see it at the right (normal position) go to the menu and choose Window > Actions, or press Option+F9.
2) You'll see there's a bunch of default folders of preset actions. At the bottom of that palette, click the folder icon to create a new set for your own actions. You don't need to, but it's nice to separate your personal actions from the rest. Give it whatever name you want and click OK.
3) Highlight your new Actions folder (it already should be selected) and click the new action icon just to the right of the new folder. You'll see this:
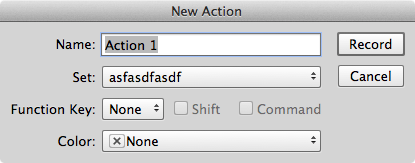
The Set: name on mine is the nonsense phrase because that's what I called my new folder for the sake of these instructions. It's just to show which action folder the action you're going to create is saved in. Give is any name you want, where it says Action 1. Something that makes sense for what you're doing, such as convert CMYK, 600 dpi. I'll call mine that so it shows up later in these instructions with the same name. Click Record. Note that the button on the Actions palette turns red, and it's recording every step you take from now until you stop it.
4) The first logical thing to do is set the resolution where the vendor wants it. Press Command+Option+I, or choose Image > Image Size from the menu.
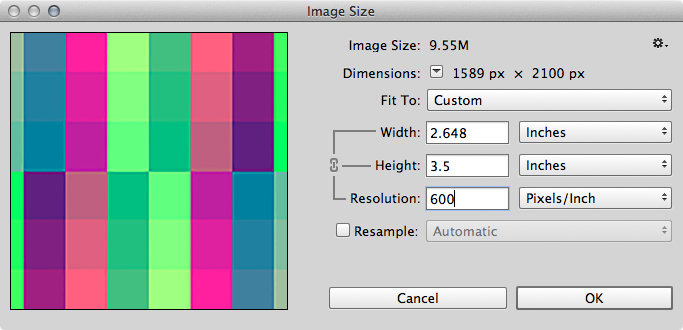
As shown here, make sure the Resample check box is off. Change the resolution to 600 and click OK.
5) Go to the menu and choose Image > Mode > CMYK Color. You may get a message about converting to CMYK. Turn on the check box to stop Photoshop from showing you this message in the future.
6) Press Command+Shift+S. In the save dialogue box, choose JPEG from the drop down menu (not JPEG 2000 or JPEG Stereo). Save the processed image to the desktop, or anywhere else the file you have open isn't so you don't overwrite it. Click Save. The JPEG dialogue box will appear. Set it as below and click OK.

7) Go back to the Actions palette and click the stop button to the left of the red record button. Okay, you have a completed Action for converting all of your images to CMYK, setting the resolution to 600 dpi, and saving as the highest quality JPEG. Delete the file you just saved to the desktop. It was just to dump a completed image somewhere to finish creating the action.
8) Put all of the images you need to convert into one folder. Create a second, new folder to save all of the converted images to.
9) Back to Photoshop. Choose File > Automate > Batch. You'll see something similar to this:
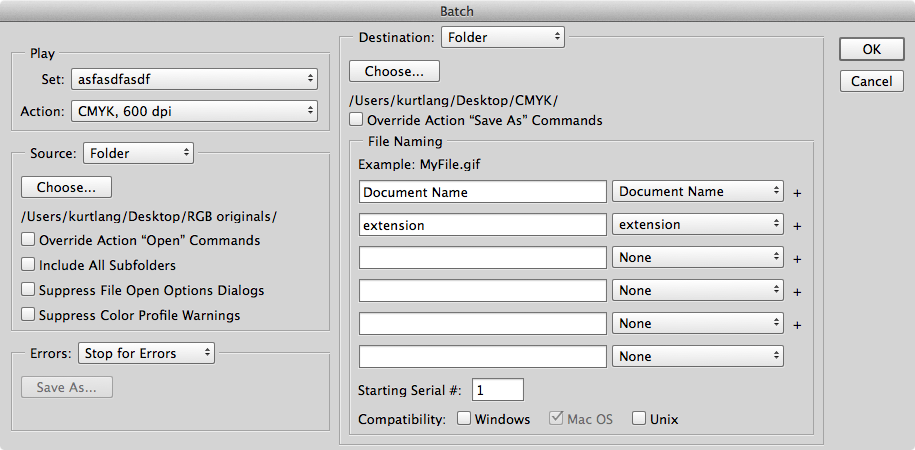
Now you tell Photoshop what to process. The source is a Folder. As you can see, I put my RGB images into a folder on the desktop named "RGB originals". The destination is also Folder. I chose a folder named "CMYK", also on my desktop.
Click OK and watch Photoshop do all the work on the RGB images in your source folder as it processes and saves them to the destination folder.