Cannot scan with officejet 8620
Using my printer & scanner utility, I keep getting "The scanner is in use by application 'ScanEventHandler'?
Apple Event: May 7th at 7 am PT
Using my printer & scanner utility, I keep getting "The scanner is in use by application 'ScanEventHandler'?
Hi Keenan1966,
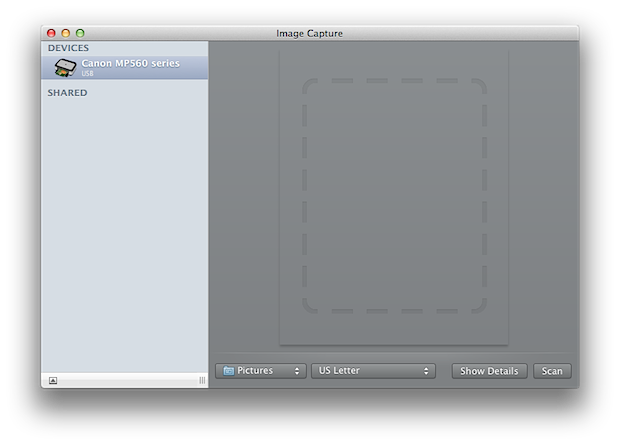
Thanks for your question. Rather than use the software that came with your OfficeJet, I'd like to suggest you try the Image Capture application on your Mac to see if you are able to scan your document. The resource below explains how. It also includes some troubleshooting steps if you are not able to scan.
Mac Basics: Using a scanner - Apple Support
http://support.apple.com/en-us/HT4505
Mac Basics: Using a scanner
Learn about using a scanner in OS X so that you can scan text documents, photographs, and so forth into files on your Mac.
Note: Your scanner may be part of a multi-function printer; see Printing for details about managing printers.
Tips for scanning in OS X
- Check the list of supported scanners for the model of scanner you are about to connect to your Mac.
- Use Software Update to automatically install third-party scanner / printer software updates.
- Connect a USB scanner to automatically create the scanner / print queue.
- You can share your USB connected scanner with other Macs on your home network.
- You can scan from various applications:
- Image Capture
- Preview
- Print & Fax preferences in System Preferences
- Scanner / Printer queue
- Some third-party applications
Important: If your scanner driver supports control panel functions in OS X, pressing a scan button on your device may not begin the scanning process. Use one of the above applications to control the scanner.
See below for more details about these features.
Before you connect your scanner
- Make sure the scanner is powered on and doesn't have any alerts displayed in its control panel.
- Make sure you know an administrator account name and password for your Mac.
Connect the scanner
Simply connect your multi-function printer or scanner via a USB cable. If you multi-function printer uses a Ethernet or wireless network, make sure it is configured to use the same local network as your Mac. Next, choose Apple () > System Preferences… and then choose View > Print & Scan. Click the + (plus) icon below the Printers pane on the left and select the printer you would like to add.
After you connect to your scanner, run Software Update to check for the latest third-party printer / scanner software and updates.
Note: Refrain from installing the software that came with your scanner as it may be out of date. OS X and Software Update contain the most recent versions of scanner software. You will see future updates when they are made available via Software Update.
How to scan
Note: This article discusses scanning via the Image Capture application (located in the Applications folder). Scanning with other applications such as Preview is a very similar process.
Simplified scan mode
In the "simplified" scanner interface, follow these steps:
- Place the item(s) you would like to scan on the scanner bed.
- Open Image Capture by clicking Launchpad in the Dock and typing Image Capture in the search field.
- OS X Mountain Lion: If your scanner has a document feeder, you can check "Use Document Feeder" to scan via the feeder instead of the flatbed.
OS X Lion and earlier: If your scanner supports different modes, you will see a "Mode:" pop-up menu in Image Capture. Modes may include Flatbed, Transparency Positive, Transparency Negative, and more.- OS X Mountain Lion: By default, Image Capture will scan to the system's default page size such as "US Letter", and scan the whole page. Click for other options such as "Detect Enclosing Box" or "Detect Separate Items".
OS X Lion and earlier: Choose "Detect Separate Items" from the "Auto selection" pop-up menu to have scanned objects automatically selected and straightened. Each item will also be stored in a separate file. Tip: Objects with high contrast edging will increase the accuracy of auto-selection. "Detect Enclosing Box" from the "Auto selection" pop-up menu to include all the items on the scanner bed in one image.- Choose where to save the scanned images from the "Scan To:" pop-up menu:
- A folder of your choosing. A number of folders are already pre-configured or choose "Other…" to select the folder you want.
- An application such as iPhoto, Aperture, or Preview.
- Mail application, to have each of your scanned images put into its own email message.
- Click "Scan" to scan.
Note: The scanned items will become JPEG images incrementally named: scan1.jpeg, scan2.jpeg, and so forth.
Advanced scanning options
Click "Show Details" if you want to enter a detailed scan mode with more advanced options. In the "Details" scanner interface you can manually select the following options:
- If your scanner supports different modes, you will see a "Mode:" pop-up menu. Modes can include: Flatbed, Transparency Positive, Transparency Negative, and so forth.
- The "Kind:" pop-up menu lets you select the kind of scan you would like.
- Choose "Color" to scan an object in color.
- Choose "Black & White" to scan in an object in Grayscale (256 or Thousands of grays).
- Choose "Text" to scan in text documents.
- The "Resolution:" pop-up menu lets you select the dpi (dots per inch) of your scanned imaged. Typically, 300 dpi is all that you need. Too high of a resolution can result in printing performance issues.
- Select the Use Custom Size checkbox to enable the "Size:" fields (if it's not already selected) to specify the width and height you want to scan. Choose pixels, inches or cm (centimeters).
- In the "Rotation Angle:" field, you can set the number of degrees of clockwise rotation for your scanned image.
- Choose one of the following from the "Auto selection" pop-up menu:
- "Detect Separate Items" to automatically select and straighten the objects you are scanning. Tip: High contrast object edging will increase the accuracy of auto-selection.
- "Detect Enclosing Box" to include all the items on the scanner bed in one image.
- Use the "Scan To:" pop-up menu to select your "Scan To:" destination. Your destinations can include:
- A folder of your choosing. A number of folders are already pre-configured or choose "Other…" to select the folder you want.
- An application such as iPhoto, Aperture, or Preview.
- Mail application, to have each of your scanned images put into its own email message.
- The "Name:" field lets you enter the name of your scanned image or images. For multiple scans, the name entered will be a part of incrementally named scans. For example, scan1.jpeg, scan2.jpeg, and so forth.
- "Format:" – Choose the image format of your scan: JPEG, TIFF, PNG, JPEG 2000, or PDF.
- "Image Correction:" – If you select "Manual", you have the following options with a histogram of the scan selection you click on. The following options are available when the "Kind:" pop-up is set to "Color."
- "Brightness:"
- "Tint:"
- "Temperature:"
- "Saturation:"
Tip: click "Restore Defaults" to reset settings.
- After Image correction, you will see a number of scanner-specific options that your particular scanner model supports.
Selecting areas to scan
If you want to select specific areas to scan (or if you unchecked "Detect Separate Items"), follow these steps. Note: The "Scan" button is dimmed until a scan area is selected.
- Deselect all currently selected scan areas by clicking in an empty area that is not yet selected (selected areas are outlined by a border that has a line of dashes).
- To specify the scanning area, click and drag to cover the area you want to scan.
- To resize a selection area, click within the border of the selected area. Gray dots appear on the border. When your cursor hovers over a handle, it will turn red. Click and drag the red handle to resize the scan area. Tip: You can Shift-click another area to select more than one.
- If you want to delete the selection, press Delete.
- If you want to rotate the selection, click the rotation handle just at the end of the line that starts in the center of the selection. When your cursor is near this handle, it turns red and a transparent image of a person will appear within the area. Click the red handle and adjust the rotation to your liking. Note:There may be a border handle to resize your selection near this handle; make sure you click on the correct handle.
- To create a new selection area, simply click and drag in an area that is not part of a selection.
How to share your USB-connected scanner on your network
- From the Apple () menu, choose System Preferences.
- From the View menu, choose Sharing.
- Enable (check) "Scanner Sharing".
- Select the connected scanner that you would like to share.
How to connect to a network shared scanner
Image Capture and Print & Scan
- Open Image Capture or Print & Scan preferences.
- Select the Scanner from the "SHARED" group in the sidebar.
Preview and other applications
- Open Preview by clicking Launchpad in the Dock and typing Preview in the search field.
- First enable Networked devices. Choose File > Import from Scanner > Include Networked Devices.
- Select your scanner. Choose File > Import from Scanner > (your scanner under "Network Devices").
If you are unable to scan
Verify the scanner has power and is turned on. Turn the scanner off and then back on again.
Learn more about troubleshooting your printer / scanner connection.
Last Modified:
Hopefully this information will help you with your scanning project.
- Judy
Cannot scan with officejet 8620