How to roll back from macOS mojave 10.14.3 to 10.14.2?
MacOS Mojave 10.14.3 is highly unstable and hence I wish to downgrade to 10.14.2. Please advise if this is possible.
MacBook, macOS 10.14
Apple Event: May 7th at 7 am PT
MacOS Mojave 10.14.3 is highly unstable and hence I wish to downgrade to 10.14.2. Please advise if this is possible.
MacBook, macOS 10.14
If you have a Time Machine or other backup of 10.14.2, you can restore from that. Otherwise a version of Mojave before 10.14.3 is not available.
See: Restore your Mac from a backup - Apple Support
You should find out what is wrong with your Mac. 10.14.3 is no less stable than previous versions of Mojave.
Downgrade macOS Mojave Guide:-
1. Back up your Mac
Back up your Mac before upgrading or erasing it. Doing so will ensure you can get your Mac restored and running just as it was before the changes were made. We’ve created a Mac backup guide which walks you through the entire process. Click the image below to back up your Mac and, when you’re done, come back and continue below.
Save Sensitive Data
Backing up your Mac will save a snapshot of all its files. Take note of all the software you have, because they will need to be reinstalled once the Mac is erased. This is crucial, especially if you are starting from scratch and don’t have a Time Machine backup to revert to. Make note of any applications or plug-ins which may need to be reinstalled. If the software also has a license placed on your computer, remove or backup the license before continuing. Visit the software manufacturer’s support page for more information.
Learn how to back up your Mac by clicking the above image.
2. Create a Bootable Drive
There are two options for reinstalling macOS: from either the internet or a bootable drive. The “from scratch” option is to install the original macOS it shipped with. That means if your Mac shipped with macOS 10.12 Sierra, you will install the most up-to-date version of Sierra. The other option is to download the installer and create a bootable external install drive. This method is preferred if you need to install a version of macOS that didn’t come with your Mac.
If you have internet access and want to install the original operating system that came with your Mac, skip this section and continue to step 3. Otherwise, follow the steps below to download a macOS installer and copy it to an external hard drive or USB thumb stick. Once done, continue below to reformat your Mac’s internal hard drive.
Download the macOS installer
1. Open the App Store application and click the Purchased tab. Click to download the macOS you want (download links below). The installer will launch once the download completes. Close the window to cancel the installation.
Downloads: High Sierra, Sierra, and El Capitan
Format the external install drive
2. Connect an empty 16GB or larger external hard drive or USB thumb drive. Open Disk Utility (Applications > Utilities > Disk Utility), select the drive, and then click Erase. When prompted, name the drive (e.g. “ExternalmacOSBootDrive”), select Mac OS Extended (Journaled), and then click Erase.
Create install drive with Terminal
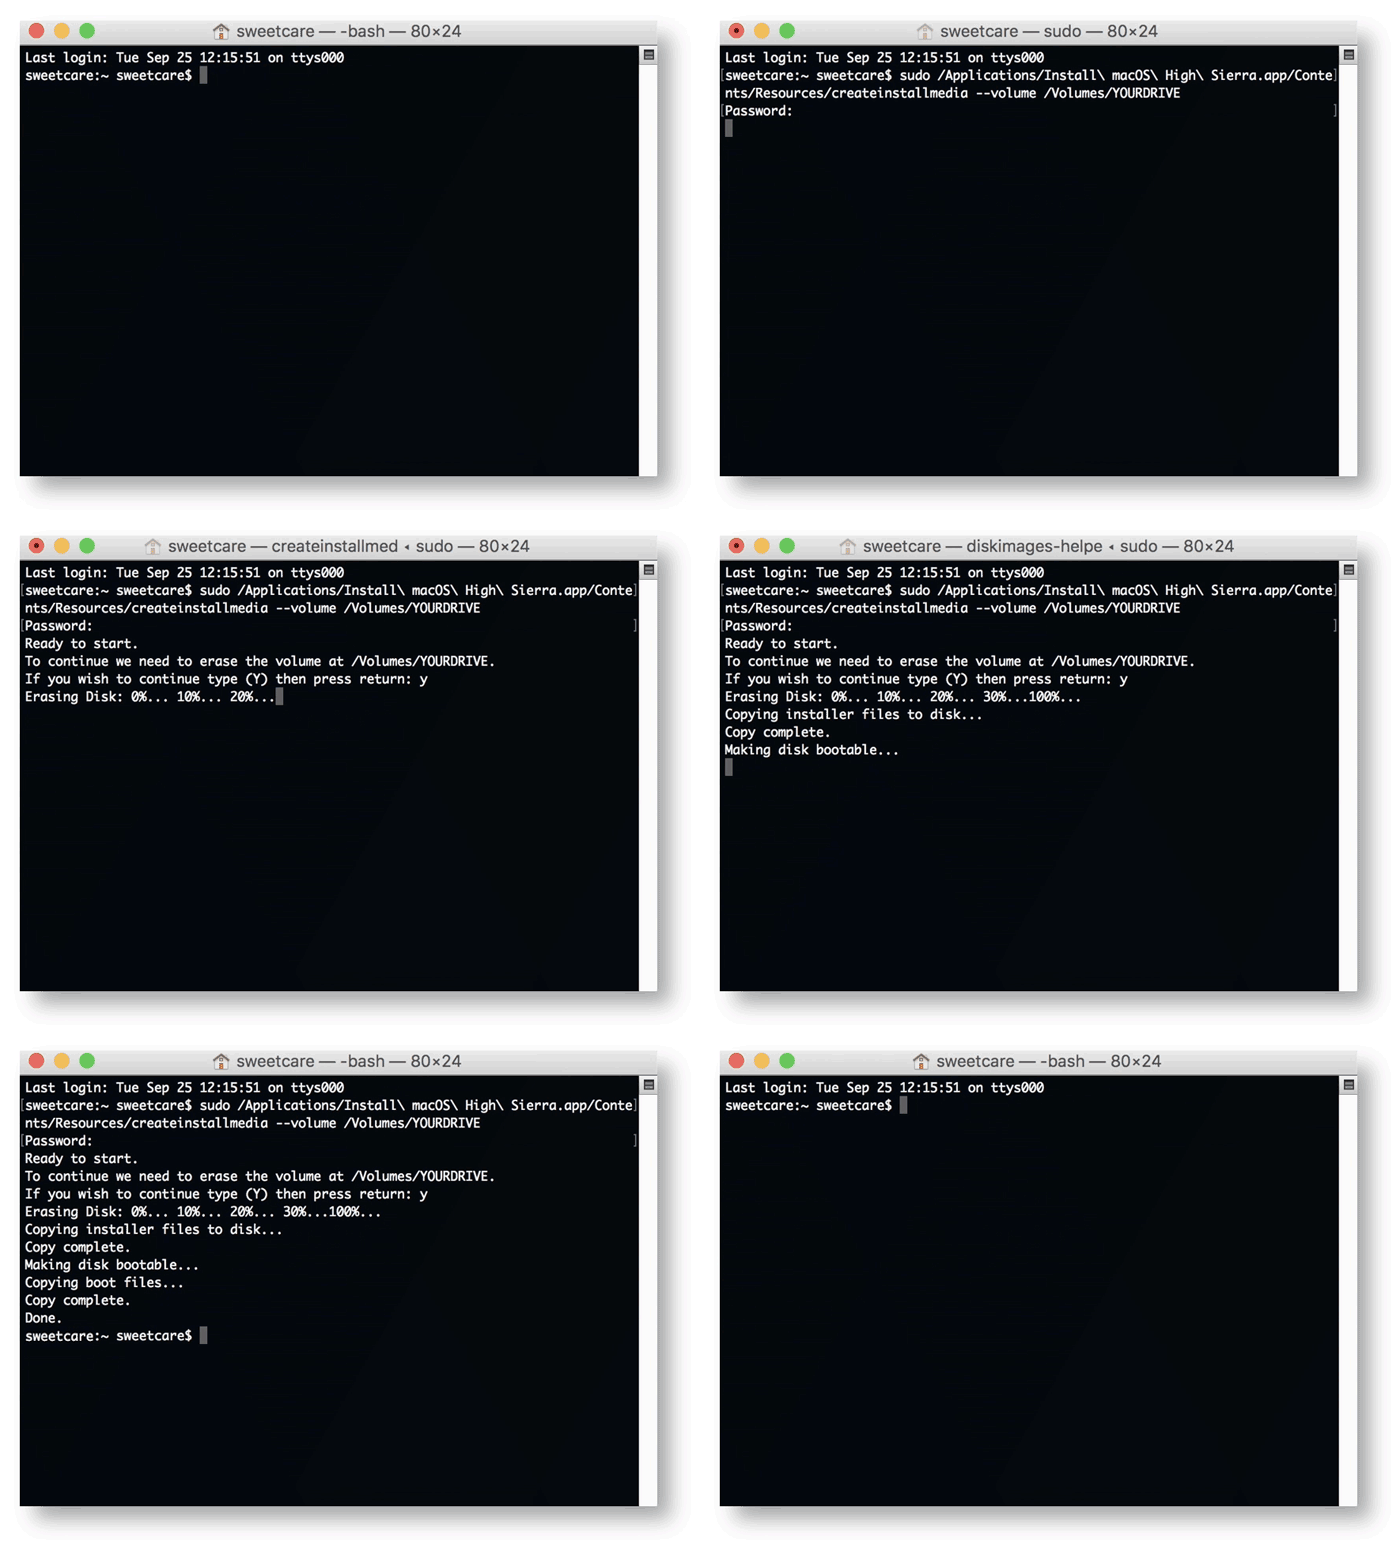
3. Launch Terminal (Applications > Utilities > Terminal). Make sure the macOS installer is in your Applications folder and take note of your external boot drive’s exact name. Enter the text below for your macOS into Terminal replacing “YOURDRIVE” with the exact name of the external install drive you just formatted.
High Sierra
sudo /Applications/Install\ macOS\ High\ Sierra.app/Contents/Resources/createinstallmedia –volume /Volumes/YOURDRIVE
Sierra
sudo /Applications/Install\ macOS\ Sierra.app/Contents/Resources/createinstallmedia –volume /Volumes/YOURDRIVE –applicationpath /Applications/Install\ macOS\ Sierra.app
El Capitan
sudo /Applications/Install\ OS\ X\ El\ Capitan.app/Contents/Resources/createinstallmedia –volume /Volumes/YOURDRIVE –applicationpath /Applications/Install\ OS\ X\ El\ Capitan.app
2. Press the Return key, enter your admin password, and then press the Return key again.
3. When Terminal prompts you to continue, press the Y key and then press the Return key. Wait until Terminal indicates the drive has been updated. It will now be named after the macOS installer.

Using Terminal to format a bootable installer drive.
and then follow the next steps given in the link
for further information use the link:-https://www.sweetwater.com/sweetcare/articles/downgrade-macos-mojave-10-14/
How to roll back from macOS mojave 10.14.3 to 10.14.2?