how to transfer iPhotos library from old MacBook to new MacBook air
where do I find my iPhotos library from my old macbook
I have folder icons in photos library on my new Mac book air but each folder is empty
MacBook, macOS 10.12
where do I find my iPhotos library from my old macbook
I have folder icons in photos library on my new Mac book air but each folder is empty
MacBook, macOS 10.12
The default Photos Library is named "Photos Library.photoslibrary," (clever) and is usually found in the user's Pictures folder. But it can be anywhere, and it can have another name. You can search for your Photos Libraries using the Finder:
At the bottom you can see the path to the library. You can see from the size (I didn't show that) if this is empty or has a bunch of pictures in it. An empty library will be only a few megabytes.
If you find it on your old Mac but not on your new one, you can just drag the Library to an external drive or a flash drive or to your iCloud drive, and then drag it to the Pictures folder on your new Mac. If you double click on the Photos Library it will open Photos, and you'll be good to go.
Hi n.mac,
We recommend you follow the steps in the link below since you want to transfer your photos library from your old Mac to your new one.
Move content to a new Mac - Apple Support
Next, we'd like to show you how to perform the recommended troubleshooting steps via the link above. Please click to open the link, then read through the steps in the section titled "Use Migration Assistant."
You're now ready to use Migration Assistant to move your files from the old Mac to the new one. Migration Assistant copies but does not delete files from your old Mac.
On your new Mac
1) Open Migration Assistant, which is in the Utilities folder of your Applications folder. Then click Continue.
2) When Migration Assistant asks you for permission to make changes, enter your administrator password, then click OK.
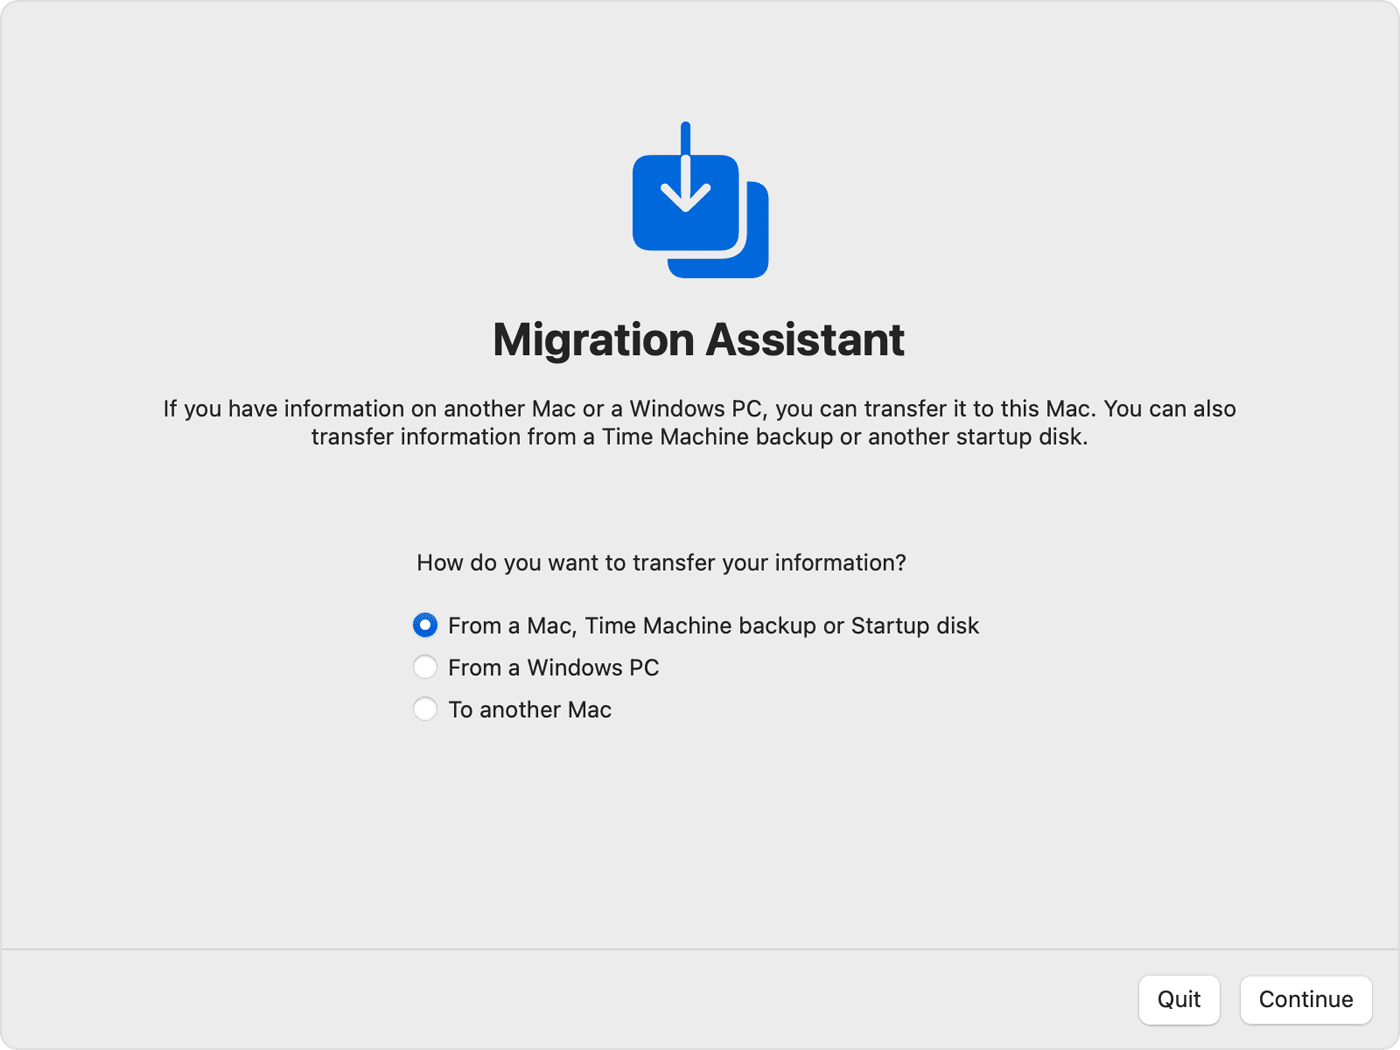
3) When asked how you want to transfer your information, select the option to transfer from a Mac, Time Machine backup, or startup disk. Then click Continue.
On your old Mac
1) Open Migration Assistant, which is in the Utilities folder of your Applications folder. Then click Continue.
2) When asked how you want to transfer your information, select the option to transfer to another Mac. Then click Continue.
On your new Mac
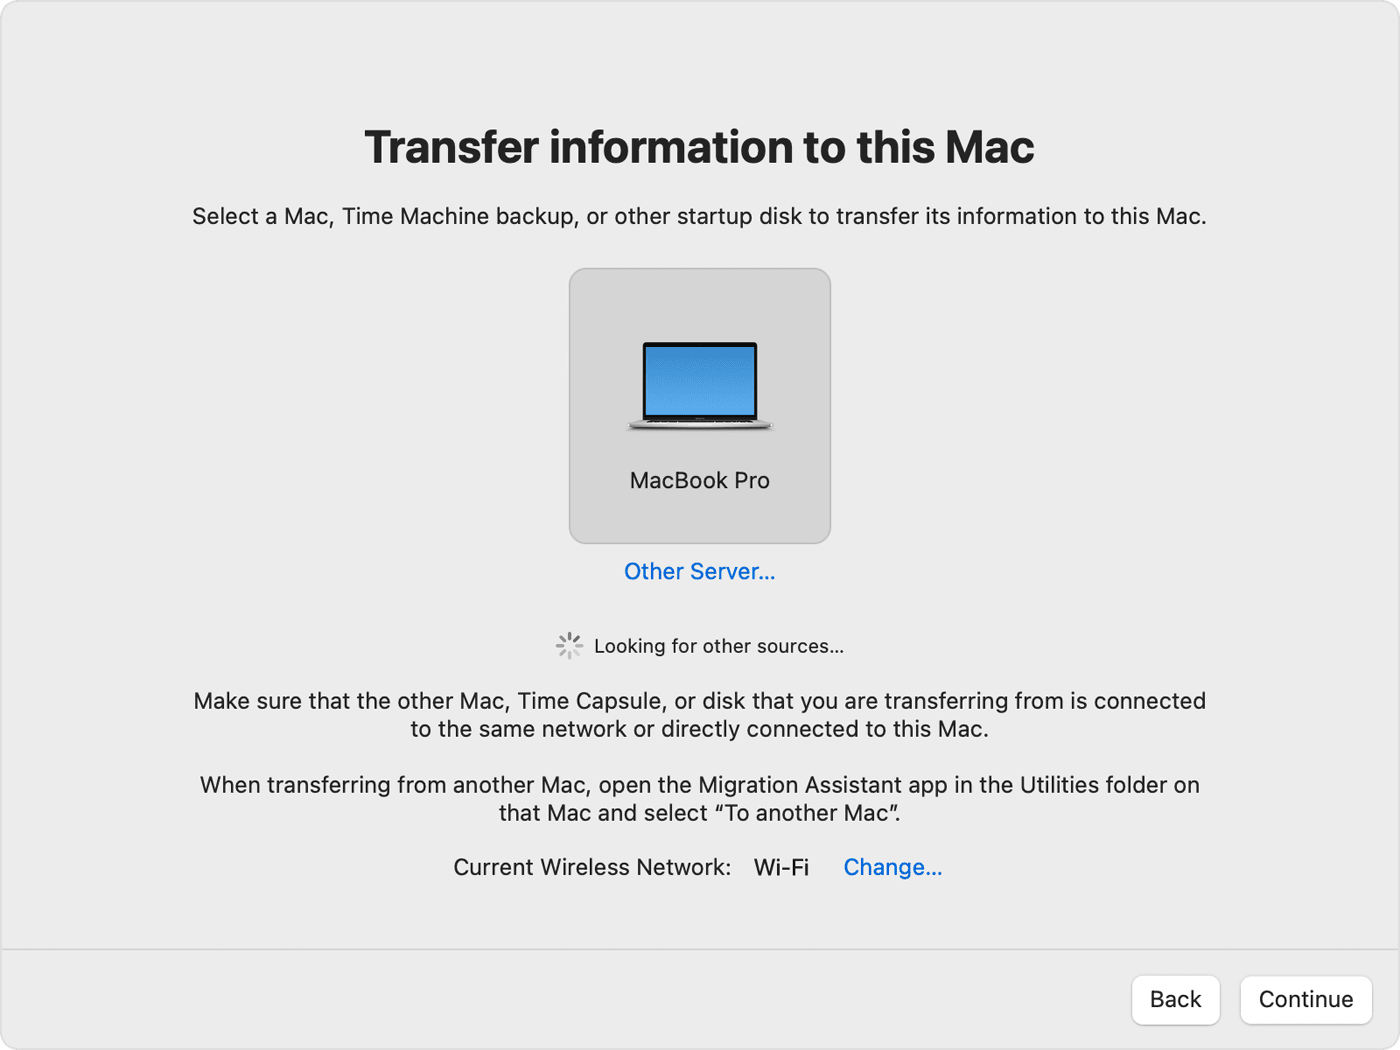
When asked to select a Mac, Time Machine backup, or other startup disk, select the other Mac. Then click Continue.
On your old Mac
If you see a security code, make sure that it's the same code shown on your new Mac. Then click Continue.
On your new Mac
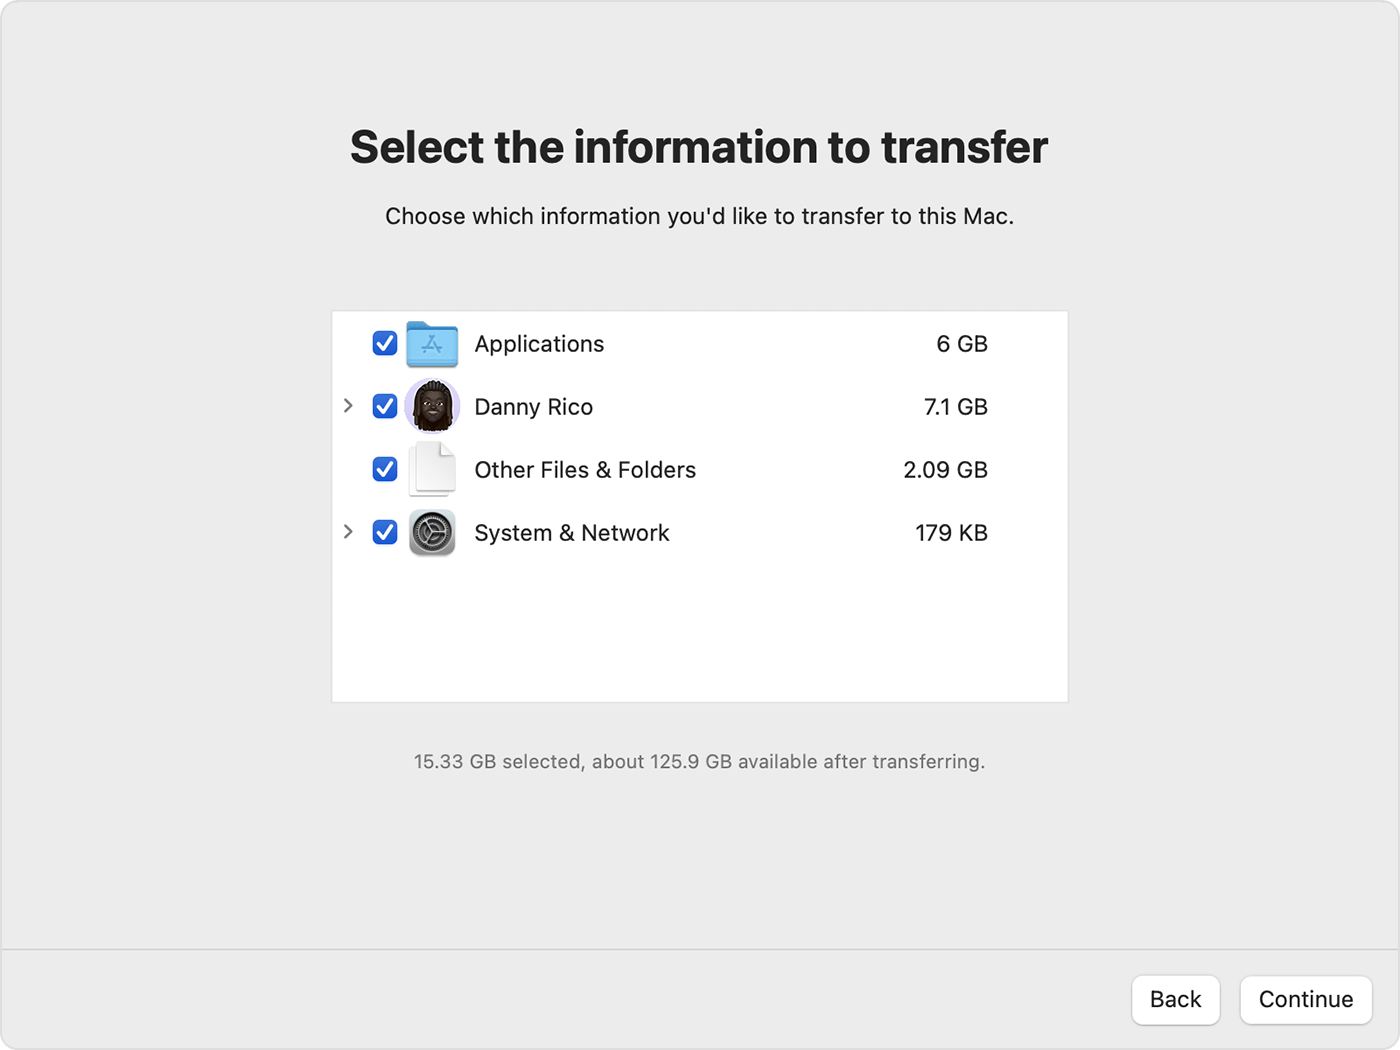
1) Migration Assistant now catalogs all of the content on your old Mac, and calculates how much storage space is used by your apps, user accounts, files, folders, and settings. This can take a few minutes. When ready, select the information to transfer.
2) Before clicking Continue, learn what it means to transfer a user account. In the example pictured here, Danny Rico is a user account. If an account on the new Mac has the same name, Migration Assistant asks whether to rename or replace:
*Rename: The account on your old Mac will appear as an additional user on your new Mac, with a separate login and home folder.
*Replace: The account on your old Mac will replace the identically named account on your new Mac.
3) Large transfers might need hours to complete, and might seem to pause occasionally. You might want to start in the evening and allow migration to complete overnight. Click Continue to start the transfer.
4) After Migration Assistant is done, quit Migration Assistant on both computers, then log in to the migrated account on your new Mac to see its files.
We recommend the above steps because they will show you how to use Migration Assistant to copy your documents, apps, user accounts, and settings to a new Mac from another computer.
If you need additional help, check out the resources in the links below.
Import photos from another library in Photos on Mac - Apple Support
Move your Photos library to save space on your Mac - Apple Support
Please let us know the outcome after giving the above steps a try.
Thanks for using the Apple Support Communities.
Cheers!
But this will just save the original photos, and not the work invested into managing the iPhoto Library - the albums, folders, the adjustments, titles, keywords.
How to transfer the library will depend on whether n.mac's iPhotos Library is an iPhoto Library or a Photos Library. iPhotos could mean either of those.
To transfer your iPhotos library from your old MacBook to your new MacBook Air, you can use the following steps:
If you're having trouble finding your iPhotos library on your old MacBook, you can try the following steps:
If you're seeing folder icons in your Photos library on your new MacBook Air but they are empty, it's possible that the import process did not complete successfully or there was an issue with the exported library. Try re-importing the library or exporting it again from your old MacBook.
how to transfer iPhotos library from old MacBook to new MacBook air