When in doubt, improvise…
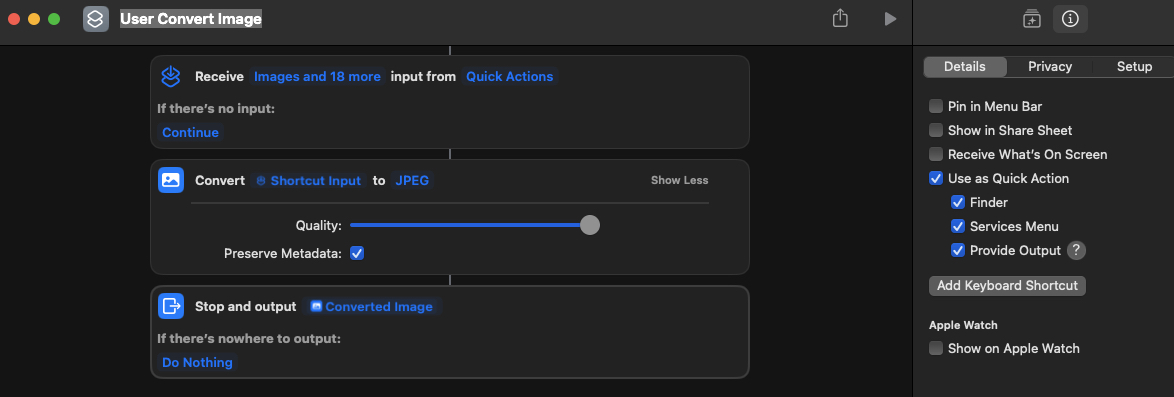
Here is a Shortcuts solution that is enabled as a Quick Action. Note the name of it in contrast to that provided by Apple.
You drag the Convert Image action onto the empty workspace. You click the i⃝ on the toolbar and that is where you select the Use as Quick Action, Finder, Service menu, and Provide Output. These selections will insert the Receive Images and 18 more action and the Provide Out inserts the last action to write the converted image in the same location as the .heic you selected in the Finder.
You may need to visit System Settings : Privacy & Security panel : Extensions : Finder to enable the new Shortcut Quick Action.
Launch Shortcuts. From its File menu, choose new Shortcut, Click where you see the User Convert Image name and enter that string for the Shortcut title. Shortcuts autosave. In the sidebar's Spotlight search field, just enter convert, and Convert Image will be the first action shown. Drag and drop that onto the larger workflow window.
I just converted a .heic to .jpg using this very shortcut on macOS 14.1.1.