Apple Intelligence is now available on iPhone, iPad, and Mac!

Looks like no one’s replied in a while. To start the conversation again, simply ask a new question.

iOS 12.1: how to remove restricted (never allow) URL?

It appears that come UI got lost or moved somewhere.

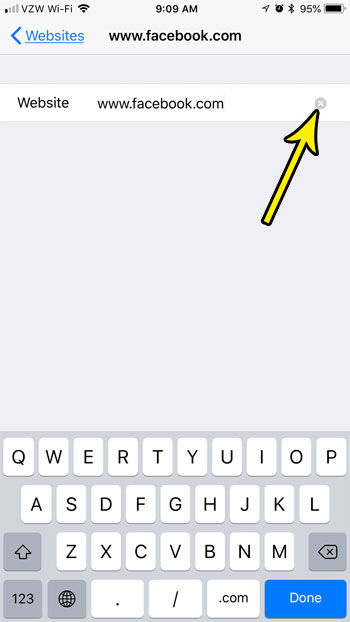
The procedure is described here in detail How to Unblock a Website on an iPhone - Live2Tech, but it does not work any more: lines in the list are reflecting taps, but nothing happens.

Please advise on updated solution or opened bug id.

iPod touch, iOS 12.1

Posted on Nov 25, 2018 11:38 AM

Reply
5 replies

Nov 27, 2018 6:26 AM in response to amaslyuk

Hello amaslyuk,

Thank you for using Apple Support Communities. It's my understanding that you need assistance unblocking a restricted website on your device. You've come to the right place! With iOS 12 Screen Time is used to restrict content on your device. Take a look at the steps and information in the link below:

Use parental controls on your child's iPhone, iPad, and iPod touch

Let us know the results. Please include any troubleshooting steps you may have tried.

Have a wonderful day!

Nov 28, 2018 9:31 PM in response to Leanne_68

Hello Starr,


Yes, this is the steps I am going through.

I have limited access set up and have some URLs added to "never allow" group.


Now, I want to remove a URL from "never allow" group; how do I do that?

I can tap on URL; it changes colour meaning it is an active element, but nothing happens.

As per the instructions in the link I provided, there was a ">" symbol on the right (picture 1 below), but it is missing in my case.

Also, there should be next form (picture 2 below) allowing to remove the URL, but I don't have it.


I understand that the pictures are for previous iOS version, but how to do the same task currently?


Regards, Andrey.


User uploaded fileUser uploaded file


User uploaded file

iOS 12.1: how to remove restricted (never allow) URL?

Welcome to Apple Support Community
A forum where Apple customers help each other with their products. Get started with your Apple Account.