Boot into your Recovery HD, restart you mac while pressing and holding down the Command and R keys.
After you have booted to your Recovery HD you should see a Utilities panel.
Select Disk Utility and press Continue.
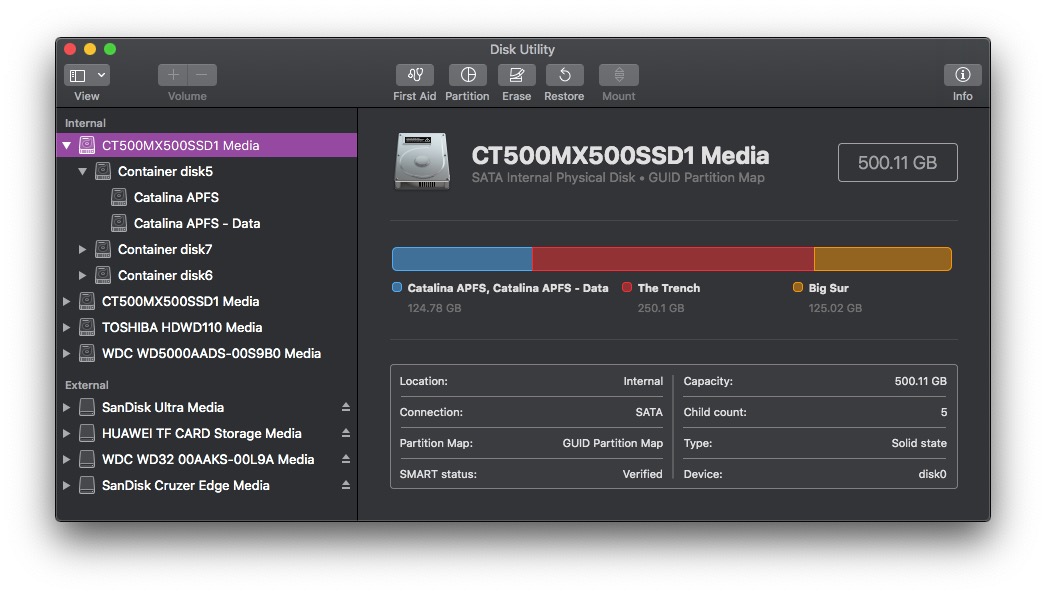
Click View in the menubar and select Show All Devices.
What do you see on the left hand panel.
You should see the Disk probably called Apple SSD..........
Underneath that and indented you should see a Container Disk with a number.
Underneath the Container Disk and indented are the two Volumes usually called
Macintosh HD and Macintosh HD - Data, please see the screenshot below for reference.
Can you run Disk Utility First Aid on first of all the Disk,
then in turn the Container Disk and then the two Volumes.
What results do you get.
Have you been making regular backups of your mac to an external hard drive.
If Disk Utility First Aid does not give green ticks for the Disk and its Volumes then you
will have to erase and reformat the Disk. This will of course mean that you will lose
all of your data, that is why it is very important to make regular backups to an external HD.
After erasing and reformatting the Disk you would then quit Disk Utility and then select Reinstall OS
or Restore from Time Machine Backup if you had been making backups.
If you need to reinstall the OS from Apples Recovery Servers your mac should be connected to your router
directly via cable, WiFi is too unreliable. Do not use any other devices that share the same internet connection
whilst your mac is downloading.
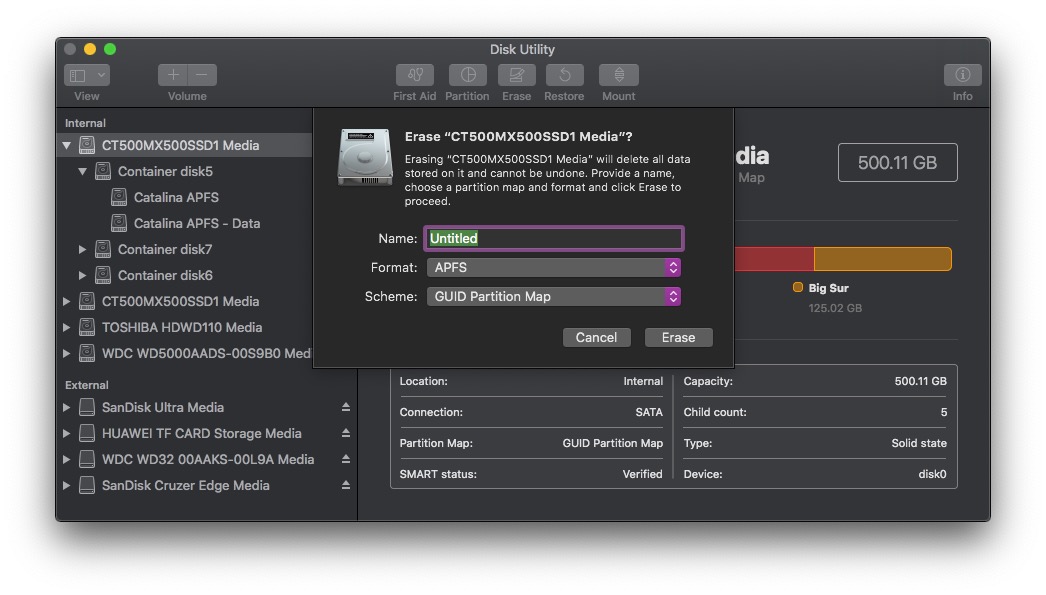
To Erase and Reformat the Disk you highlight the Disk (AppleSSD.....) click on Erase.
From the following drop down give the Disk a name.
Format: APFS.
Scheme: GUID Partition Map.
Click Erase.
When Done quit Disk Utility.